Showing posts with label Desserts. Show all posts

Friday, February 13, 2026

Old-Fashioned Chocolate Chip Torte

A Simple, Moist Date Cake with Chocolate and Whipped Cream


Some desserts don’t need layers or frosting to feel special. This old-fashioned Chocolate Chip Torte is one of those simple, dependable recipes that quietly becomes a family favorite. Baked in a 9x13 pan and topped with melty semi-sweet chocolate chips, it’s the kind of dessert that shows up after Sunday supper or at a church potluck.

What makes this torte unique is the addition of finely chopped dates softened in boiling water. They melt into the batter as it bakes, creating a moist, tender crumb without making the cake overly sweet. Combined with cocoa powder, rich chocolate chips, and optional chopped nuts, every bite has deep chocolate flavor and a soft texture that stays fresh for days.

It’s easy to make, uses pantry staples, and doesn’t require frosting — just a dollop of whipped cream on top. If you love vintage chocolate desserts that feel cozy and comforting, this Chocolate Chip Torte is one you’ll come back to again and again.

This Chocolate Chip Torte makes the perfect ending to a comforting supper like my Old-Fashioned Tomato Pork Chops and Rice.  

Ingredients:

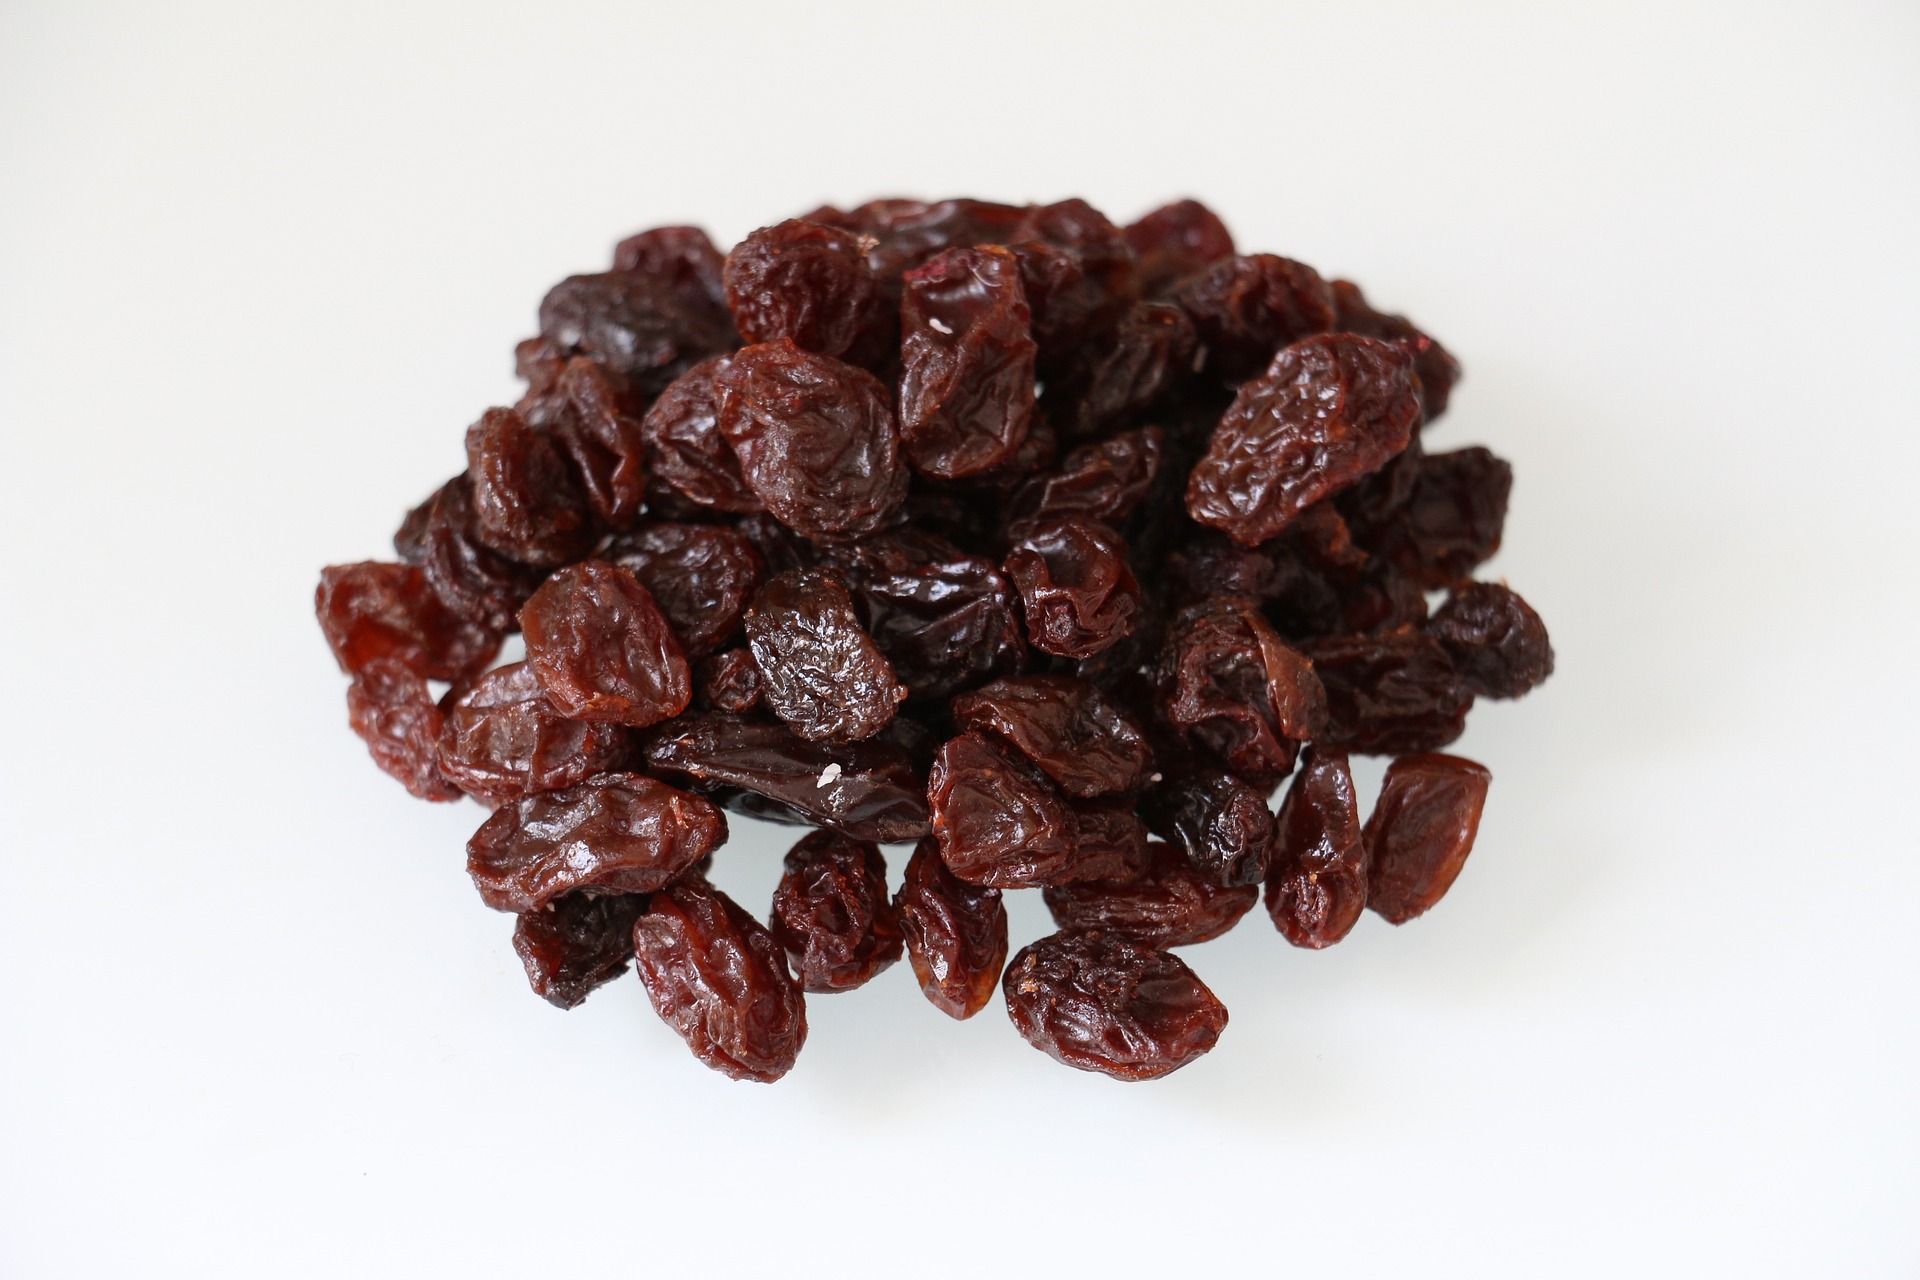
1 c. dates, finely chopped
1 c. boiling water
1 c. shortening or butter
1 c. granulated sugar
2 eggs, beaten
1 tsp. vanilla extract
1 3/4 c. flour
2 Tbs. cocoa powder
1/2 tsp. salt
1 tsp. baking soda
6 oz. semi-sweet chocolate chips
3/4 c. nuts, chopped (optional)
whipped cream

Directions:

Preheat oven to 350°F. Grease a 9x13-inch baking pan.

Place the chopped dates in a medium bowl. Pour the boiling water over them and set aside to cool. This softens the dates and helps them blend smoothly into the batter.

In a large mixing bowl, cream together the shortening and sugar until light and fluffy.

Add the beaten eggs and vanilla extract. Beat until well combined.

In a separate bowl, whisk together the flour, cocoa powder, salt, and baking soda.

Gradually add the flour mixture to the creamed mixture, alternating with the cooled date mixture. Begin with flour, then dates, mixing gently after each addition just until combined. Do not overmix.

Spread the batter evenly into the prepared pan.

Sprinkle the top with chocolate chips and chopped nuts, if using.

Bake for 40–45 minutes, or until a toothpick inserted in the center comes out clean.

Allow to cool slightly before cutting into squares. Serve with whipped cream. 

Tips for Best Results:

• Make sure the date mixture cools before adding to the batter so it doesn’t cook the eggs.
• Do not overmix once the flour is added — this keeps the torte tender.
• For extra richness, use real butter instead of shortening (flavor will be deeper).
• Check at 40 minutes — ovens vary.

Variations and Substitutions:

• Replace shortening with butter for a richer flavor.
• Use walnuts or pecans for a traditional touch.
• Add 1/2 teaspoon cinnamon for warmth.
• Stir chocolate chips into the batter instead of sprinkling on top.
• Dust with powdered sugar instead of whipped cream for a lighter finish.

Serving Suggestions: 

This old-fashioned Chocolate Chip Torte is delicious served slightly warm with a dollop of fresh whipped cream.

You can also serve it with:

• A scoop of vanilla ice cream
• A drizzle of chocolate sauce
• Fresh berries for contrast
• A cup of hot coffee or tea
• A glass of cold milk

For a holiday version, sprinkle lightly with powdered sugar before serving.

Serve after a cozy meal like:

 How to Store and Reheat:

Room Temperature:
Store covered for up to 3 days.

Refrigerator:
Keeps well for up to 5 days in an airtight container.

Freezer:
Freeze individual squares wrapped tightly for up to 2 months.

To Reheat:
Warm a slice in the microwave for 10–15 seconds for that fresh-from-the-oven feel.

Frequently Asked Questions:

Why are dates used in this recipe?
Dates add moisture and natural sweetness, making the cake tender and rich.

Can I skip the nuts?
Yes, they are completely optional.

Is this more like a cake or a brownie?
It’s somewhere in between — moist like cake, slightly dense like a brownie.

Can I make this ahead of time?
Yes, it tastes even better the next day as the flavors settle.

Friday, February 6, 2026

Grandma’s Lemon Celebration Cake

 Fresh Zest, Sweet Memories, and a Creamy Lemon Buttercream

 One year, my mom’s brother sent her a box of lemons he had grown himself. They were enormous, fragrant, and bursting with flavor — far better than anything from the store. My mom couldn’t wait to bake with them, and this lemon cake became one of the sweetest results. It was so good that she made again to celebrate my Grandmother's 65 birthday.  

This cake is soft, tender, and bright with fresh lemon zest and juice. The cream cheese buttercream adds just enough richness to balance the citrus. It’s the kind of cake that feels special but still homemade — the kind you bring to the table with pride.

Ingredients:

3 c. flour
2 1/2 tsp. baking powder
1/2 tsp. baking soda
1/2 tsp. salt
1 c. unsalted butter, softened to room temperature
1 3/4 c. sugar
3 large eggs, room temperature
2 tsp.  vanilla extract
1 c. milk, at room temperature
1 heaping Tbs. lemon zest (about 2 lemons)
1/3 c. fresh lemon juice (about 2 lemons)

Cream Cheese Buttercream Frosting

1 c. unsalted butter, room temperature
1 - 8 oz. pkg. cream cheese, room temperature
4 1/2 c. powdered sugar
2 Tbs. fresh lemon juice
1 tsp. vanilla extract
pinch salt, to taste 

Directions: 

 Preheat oven to 350°F (177°C).
Grease two 9-inch cake pans, line with parchment paper rounds, then lightly grease the parchment again.

In a medium bowl, whisk together the flour, baking powder, baking soda, and salt. Set aside.

In a large mixing bowl, beat the butter and sugar on high speed for about 3 minutes, until light and creamy. Scrape down the bowl as needed.

Add the eggs one at a time, beating well after each addition. Mix in the vanilla extract. Beat for about 2 minutes until smooth and well combined.

Reduce mixer speed to low. Add the dry ingredients and mix just until combined. Do not overmix.

Add the milk, lemon zest, and lemon juice. Mix just until incorporated. The batter will be slightly thick.

Divide the batter evenly between the prepared pans.

Bake for 21–26 minutes, or until a toothpick inserted into the center comes out clean.

Allow cakes to cool in the pans for 10–15 minutes, then remove from pans and transfer to a wire rack to cool completely before frosting.

Beat the butter on medium speed for about 2 minutes until creamy.

Add the cream cheese and beat until smooth and fully combined.

Add powdered sugar, lemon juice, vanilla extract, and a pinch of salt.
Mix on low speed until incorporated, then increase to high and beat for 3 minutes until light and fluffy.

If frosting is too thin, add more powdered sugar.

If too thick, add a small splash of lemon juice. 

If the cake layers are domed, level one layer so it sits flat.

Place the flat layer on a cake stand or serving plate. Spread about 1 cup of the frosting evenly over the top.

Place the second cake layer on top of the frosting, (flat side down for best stability).

Frost the top and sides with the remaining frosting.

Refrigerate for 30–45 minutes before slicing. This helps the cake hold its shape.

Store leftover cake tightly covered in the refrigerator for up to 5 days.

Notes:

If you ever find the batter looks slightly curdled after adding lemon juice, don’t worry — that’s normal. It smooths out during baking.

For even stronger lemon flavor, you could add 1/2 tsp. lemon extract. 

 🍰 Serving Suggestions

This cake pairs beautifully with:

A hot cup of tea (Earl Grey or chamomile are lovely)

Fresh berries on the side

A dollop of lightly sweetened whipped cream

Lemon slices or candied lemon peel for garnish

A dusting of powdered sugar just before serving

A small scoop of vanilla bean ice cream for special occasions

For gatherings:

Serve slightly chilled for clean slices.

Garnish with thin lemon slices and a sprig of mint for a soft, elegant presentation.


Friday, January 30, 2026

Old-Fashioned Banana Cream Dessert Bars

A rich and creamy layered dessert with fresh bananas, cream cheese, and pudding on a buttery graham cracker crust.


This cool and creamy banana dessert is the kind of treat that always feels special, yet comes together with simple pantry ingredients. With a buttery graham cracker crust, layers of sweet cream cheese, fresh bananas, and fluffy banana pudding, it’s the perfect make-ahead dessert for Sunday dinner, potlucks, or warm summer evenings.

It’s light, nostalgic, and always one of the first desserts to disappear from the table.

Ingredients:

1/2 c. butter, melted
1/4 c. sugar
1 3/4 c. graham crackers, crushed into crumbs

Filling:

1 (8 oz.) package cream cheese, softened
1/2 c. sugar
1 (8 oz.) container whipped cream topping, (about 3 cups), divided
3 or 4 bananas, sliced
1 3/4 c. cold milk
1 (3.4 oz.) package instant banana cream pudding mix

Directions:

Preheat the oven to 350°F. Lightly butter a 9-inch square baking dish.

In a medium saucepan over low heat, melt the butter. Stir in the sugar and graham cracker crumbs until well combined.

Press the crumb mixture firmly into the bottom of the prepared pan.

Bake for 5–7 minutes, just until set. Remove from the oven and allow the crust to cool completely on a wire rack. 

While the crust cools, it is time to make the filling.

In a large mixing bowl, beat the softened cream cheese and sugar together on medium-high speed until light and fluffy.

Gently fold in 2 cups of the whipped topping until smooth and creamy.

Slice the bananas into thin rounds.

Arrange half of the banana slices evenly over the cooled crust. Spread half of the cream cheese mixture over the bananas. Repeat the layers with the remaining bananas and cream cheese mixture.

In a small bowl, whisk together the cold milk and instant pudding mix for about 2 minutes, until it begins to thicken.

Let it sit for a few minutes until soft-set.

Fold in 1 cup of the remaining whipped topping until smooth.

Spread the pudding mixture evenly over the cream cheese layer.

Refrigerate for 1–2 hours, or until fully set.

Slice and serve chilled, topped with extra whipped cream if desired.

Notes:

For best flavor, use ripe but firm bananas.

To prevent bananas from browning, you may lightly brush them with a little lemon juice before layering.

This dessert is best served the same day or within 24 hours for the freshest appearance.

You can also use homemade whipped cream instead of whipped topping if preferred. 

Serving Suggestions:

Because this is a rich dessert, a little goes a long way — and that makes it perfect for gatherings.

Serve well chilled with an extra dollop of whipped cream on top.

Garnish with a few fresh banana slices just before serving.

Sprinkle crushed vanilla wafers or graham cracker crumbs over the top for added texture.

Add a light drizzle of caramel sauce for an extra special touch.

This pairs beautifully with:

Hot coffee

Iced tea

A simple Sunday supper of roast, potatoes, and green beans

It’s especially lovely for potlucks, church dinners, or when neighbors stop by unexpectedly — just like the recipe once did. 💛 

Friday, January 23, 2026

Mom’s Old-Fashioned Peach Cobbler

This easy, old-fashioned peach cobbler is a comforting homemade dessert made with fresh or canned peaches and simple pantry ingredients. Perfect any time of year.

I can still remember the summer months when my mother would bring home fresh peaches and bake her homemade peach cobbler. It was a special treat for our family, especially after long days when Dad came home tired from hauling gravel. A warm dish of old-fashioned peach cobbler on the table had a way of making everything feel a little better.

Back then, the peaches always seemed to taste better — or maybe it was just my mom’s simple, from-scratch cooking that made everything so good. Those are the kinds of food memories that stay with you long after the dishes are done.

Although peach cobbler is often thought of as a summer dessert, this easy recipe can be enjoyed any time of year. Fresh peaches are wonderful when they’re in season, but canned peaches work beautifully, and home-canned peaches make it even more special.

Served warm, with a scoop of vanilla ice cream or a dollop of whipped cream melting over the top, this peach cobbler feels right at home at the end of a Sunday supper. It’s a simple, comforting dessert made with just a few pantry ingredients — the kind that invites you to gather around the table and make sweet memories of your own.

Ingredients:

2–3 cups sliced peaches (See Notes)
2 c. sugar, divided
1 c. flour
2 tsp. baking powder
1/8 tsp. salt
5 Tbs. butter, melted
3/4 to 1 c. milk
Whipped cream or ice cream, optional

Directions:

Preheat oven to 350°F.  9-inch square baking dish

In a bowl, combine sliced peaches with 1 cup of sugar. Stir gently and set aside to allow the juices to form.

In a separate bowl, whisk together the remaining 1 cup of sugar, flour, baking powder, and salt. Create a well in the center and add 3/4 cup milk. Whisk until smooth and similar to pancake batter, adding more milk if needed.

Pour melted butter into the bottom of a baking dish.

Carefully pour the batter over the butter. Do not stir.

Spoon the peaches and some of their juices evenly over the batter. Again, do not stir.

Place the baking dish on a cookie sheet or over foil to catch any drips.

Bake for about 45 minutes, or until puffed and golden brown. The batter will rise around the fruit as it bakes.

Serve warm with whipped cream or ice cream, if desired. 

Notes:

If using canned peaches, drain lightly and omit the sugar added to the fruit.

This recipe works well with other fruits or fruit combinations.

Friday, January 2, 2026

Pumpkin Bars with a Crust

 Pumpkin Bars with a Crust: An Easy, Rich Dessert Everyone Loves

Pumpkin desserts aren’t just for one season—they’re delicious any time of year. If you love pumpkin pie but want something a little easier to serve, these pumpkin bars with a crust are the perfect solution. This simple, family-favorite recipe combines a creamy pumpkin filling with an easy homemade crust for a dessert that’s great for gatherings, holidays, or everyday treats. With straightforward steps and familiar ingredients, these pumpkin bars come together effortlessly and always disappear fast.

When you hear the word pumpkin, your mind probably jumps straight to pumpkin pie and Thanksgiving. My family and I absolutely love pumpkin pie, but every once in a while, we like to enjoy those classic flavors in a different way.

Many years ago, a neighbor shared her pumpkin bars with us. They were incredibly delicious, but they didn’t have a crust. Since we’re big fans of a good crust, we decided to make our own. The crust is super easy to put together—so easy, in fact, that my kids were able to make it when they were younger.

This recipe may look a little long at first glance, but don’t let that discourage you. It’s actually very simple to prepare.

In no time, your home will be filled with the cozy aroma of pumpkin and warm spices baking in the oven. These pumpkin bars are rich, flavorful, and absolutely delicious—perfect for sharing (or not 😉).

 Crust

1 stick butter melted
1 1/4 c. flour
1/3 c. brown sugar
3/4 tsp. cinnamon
1/2 c. finely chopped pecans (optional)

Filling

1 – 29 ounce can of pumpkin or 3 cups pumpkin purée
1 c. firmly packed brown sugar
1/4 c. sugar
2 tsp. cinnamon
1/2 tsp. ginger
1/2 tsp. cloves
5 eggs, lightly beaten
1– 12 ounce can evaporated milk

Topping

3/4 c. of flour
1/2 c. oatmeal
1/2 c. brown sugar
1/4 c. plus 2 tablespoons cold butter cut into small pieces
1/2 c. chopped pecans (optional)
 
Directions:
 
Preheat oven to 350° F.   A 13×9-inch cake pan, ungreased.

Melt the butter in a small saucepan over low heat so it doesn't burn. Remove from heat. Stir in the flour, brown sugar, and cinnamon.  If you wish to add pecans, this is the time to mix them in as well. Mix thoroughly to combine.

Press the mixture into the cake pan. Set aside while you prepare the pumpkin filling.
 
In a large bowl, combine pumpkin, brown sugar and white sugar together.  Mix well.
 
Stir in the cinnamon, ginger and cloves. 
 
Add the lightly beaten eggs, mixing until the batter is smooth. Continue to stir the pumpkin mixture as you slowly pour in the milk.  Mix thoroughly.

Pour this mixture over the prepared crust.

Bake for 25 to 30 minutes, or until partially set. You do not want the pumpkin completely cooked yet.  
 
While the pumpkin is in the oven, assemble the topping. 
 
Combine the flour, oatmeal, and brown sugar into a medium-sized bowl. 
 
Add the cubed butter.  Using a pastry knife or two knives held together in one hand, cut the butter into the flour mixture until it becomes small particles about the size of peas. At this point, you can add the pecans if you desire.  Set aside.

Remove the pumpkin from the oven at the end of 25 to 30 minutes baking time.  Sprinkle the oatmeal, flour mixture over the top of the partially baked pumpkin. Return the pan into the oven and bake for another 15 to 20 minutes, or until a knife inserted in the center comes out clean.

Allow the pumpkin to cool before serving it with a dollop of whip cream. You can even add a sprinkle of cinnamon over the top, if desired.

Friday, January 17, 2025

Raisin Streusel Coffee Cake

Raisin Streusel Coffee Cake


What could be better for breakfast, or served as a dessert, than Raisin Streusel Coffeecake? Buttery, rich cake, with a layer of cinnamon streusel and raisins in the center. More streusel and raisins are sprinkled on top. Finally, lemon icing is drizzled over the streusel.
 
Serve this cake with coffee, and you have a wonderful breakfast or lunch treat.  It's certain to please your whole family.

Streusel


2/3 c. flour
2/3 c. sugar
3/4 tsp. cinnamon
4 Tbs. butter or margarine
 

Cake

1/2 c. butter or margarine
3/4 c. sugar
1 Tbs. grated lemon peel
1/2 tsp baking powder
1 tsp. vanilla extract
3/4 tsp. soda
1/4 tsp. salt
2 large eggs
2 c. flour
1 c. sour cream
1/2 c. raisins
 

Icing

3/4 c. confectioners' sugar
1 Tbs. lemon juice
1/3 c. raisins

Directions:

 
Heat oven to 350°. Lightly grease an 8-inch baking pan.

Prepare the streusel.


In a small bowl, combine flour, sugar and cinnamon. Cut in the butter with two table knives held together in your hand, or you can use a pastry cutter or a food processor. The mixture should resemble coarse crumbs. Place the flour mixture in the refrigerator while you assemble the cake.

In a mixing bowl, combine butter, sugar, lemon peel, baking powder, vanilla, soda and salt.  Beat the mixture with a mixer on high speed until light and fluffy. This may take about 3 minutes.

Add eggs, 1 at a time, beating well after each addition. The mixture may look curdled, but don't worry, this is a natural reaction.

Turn the mixer speed to low.  Alternating between the flour and the sour cream, beginning and ending with flour, mix each addition into the batter until combined.  The batter will be thick.

Spread half the batter in the prepared pan. 
 
Remove the streusel from the refrigerator.  Sprinkle a 1 /2 cup streusel over the batter. Then, add the raisins over the streusel.  

Drop spoonfuls of the remaining cake batter on top, then spread it gently into an even layer. 

Sprinkle with remaining streusel. With the back of a spoon, lightly press the streusel into the batter.

Bake 55 to 60 minutes until a toothpick inserted in the center comes out clean. Cool on a wire rack for 10 minutes, while you make the icing.

For the icing, combine powdered sugar and lemon juice, in a small bowl. Mix until smooth. Dip a fork or a spoon into the icing, then drizzle the icing over the top of the cake. 

Sprinkle the raisins over the top. Let stand until icing dries. 
 
Serve and enjoy.

Friday, January 10, 2025

Overnight Coffee Cake

Overnight Coffee Cake

Occasionally, I like to treat my kids with something special for breakfast. This overnight coffee cake is super simple to make, and it tastes, so good.  

By preparing the cake the night before and setting it in the refrigerator, you don't have to get up early to make it.  All you do is take it out of the refrigerator and place it in the preheated oven.  What better way to wake up the family then with the scents of cinnamon and nutmeg wafting through the house.

This recipe does call for nuts, but you can leave them out.  I rarely add nuts to our recipes.  We aren't allergic to them, we just don't like them in our food.

Ingredients

3/4 cup butter, softened
1/2 c. sugar
1/2 c. brown sugar
2 eggs
1 c. buttermilk *
2 c. all-purpose flour
1 tsp. baking powder
1 tsp. baking soda
1/2 tsp. salt
1/2 tsp. cinnamon
1 tsp. nutmeg

Topping

3/4 c. brown sugar
1 tsp. cinnamon
1/2 c.Pecans or walnuts (Optional)

Directions
 
Grease and flour a 9 x 13-inch cake pan.

In a large mixing bowl, cream butter and sugar until light and fluffy.

Add eggs and buttermilk. Mix thoroughly.

Stir in the baking powder, soda, salt cinnamon and nutmeg.

Mix in the flour until the better is smooth.

Pour the batter into the prepared cake pan.
  
In a small bowl, combine the topping ingredients of brown sugar, cinnamon and nuts, if desired.
 
Sprinkle half of this mixture over the top cake batter. Take a knife and cut through the batter to swirl the sugar and cinnamon mixture through the cake batter. Then, sprinkle the remaining sugar cinnamon mixture evenly over the top of the cake.  Do not cut through or swirl this. 
 
Cover the pan with clear plastic, or foil, and place in the refrigerator for 8 hours or longer.

The next morning, preheat oven to 350°.
 
Remove the coffee cake from the refrigerator and take off the plastic wrap.

Bake 35 to 45 minutes, or until cakes tests done with a toothpick. To test, insert a toothpick in the center of the cake. If it comes out clean, you know it is done. 
 
Cut while the coffee cake is still warm. Eat and enjoy. 
 
Notes *
 
If you don’t have buttermilk, you can substitute it by mixing the milk, add 1 tablespoon vinegar.    Allow the mixture to sit for 5 minutes before adding it to your cake. Don't worry when the milk turns lumpy, because that is what it is supposed to do.  
 

Friday, April 21, 2023

Banana Cupcakes

Banana Cupcakes

These cupcakes are moist and they taste so good. They are good on their own, or you can frost them with the buttercream frosting. If you have very ripe bananas, this is a great recipe to use them up, so they do not go to waste. 

Ingredients

12 cupcake liners (optional)
1 1/2
c. sugar
1/2 c. shortening, butter, or margarine
2 eggs (slightly beaten)
3 very ripe bananas, mashed

1/4 c. sour milk
1 tsp. vanilla
1 tsp. baking powder
1/2 tsp. baking soda
1/2 tsp. salt
2
c. flour
1/2 to 1 cup nuts (optional)

Buttercream Frosting  

3 c. powdered sugar
1/3 c. butter or margarine, softened
1 tsp. vanilla
12 Tbs. milk

Instructions

Preheat oven to 350°. Line muffin tines with cupcake papers, or lightly spray or grease the cupcake pan.

In a bowl, combine sugar and shortening.  Mix until it is light and fluffy.

Beat in the eggs, one at a time.  Beating well after each addition. 

Mix in the mashed bananas until the mixture is smooth.

Pour in the sour cream and vanilla, beating until thoroughly combined.

Add the baking powder, baking soda, salt and flour. Mix until combined.

Stir in nuts, if desired.

Pour the batter into prepared muffin tins.

Bake for 15 to 20 minutes, or until a toothpick inserted in the center comes out clean.

When the cupcakes are cooled, it is time to make the frosting.

In a bowl, combine powdered sugar and butter.  Mix until smooth.

Pour in vanilla and 1 tablespoon milk.  Beat the mixture until smooth.  Keep beating in a little more milk until you get the frosting the right consistency for spreading. You may also add a few drops of food coloring to the frosting to make it a different color.  

Frost the tops of the cupcakes. Serve and enjoy!

Friday, April 14, 2023

Butterscotch Cream Pie

Butterscotch Cream Pie

Butterscotch is one of our favorite flavors, and it really tastes good in a cream pie. This is an easy recipe that my family enjoys.

Ingredients

1 (9-inch) pie crust, homemade or store bought, baked and cooled
1 1/2 c. brown sugar, divided
4 Tbs. cornstarch
3 Tbs. flour
1/4 tsp. salt
2 c. milk
3 egg yolks, beaten
2 Tbs. butter
1 tsp. vanilla

Meringue topping

3 egg whites
1/4 tsp. cream of tartar
1/4 c. sugar

Directions

In a heavy bottomed saucepan or a double boiler, combine brown sugar, cornstarch, flour and salt. 

Stir in some of the milk to make a stiff paste.  

Mix in egg yolks.  

Add in the rest of the milk, stirring or whisking until smooth. You don't want any lumps in your pie.

Cook and stir over medium-low heat until the mixture thickens. This takes a while, but it is important that you do not stop stirring the mixture, or it will burn. Don't remove it off the heat too soon, or your pie will be too soft.

Stir in butter, and vanilla. Mix until the butter is melted and thoroughly combined.

Pour into your baked and cooled pie crust.

While the pie is still hot, it is time to prepare the meringue topping.

In a clean mixing bowl, beat egg whites and cream of tartar until soft peaks form, on medium speed.

Turn the mixer on high speed and gradually beat in the sugar, about a tablespoon at a time. Beat until stiff, glossy peaks form and the sugar is dissolved. 

Spread the meringue over the top of the still hot pie.  Be sure to cover the entire top, sealing the edge to the crust. 

Bake at 350°  for 10 to 15 minutes, or until the meringue is a golden brown.

Saturday, April 8, 2023

Easter Sugar Cookies

Easter Sugar Cookies


These sugar cookies are easy to make and they taste so good. They are crisp on the outside, but soft on the inside.  This is a recipe that you and your kids can have so much fun decorating with colorful frostings and sprinkles.

Ingredients

3/4 c. butter
1 c. sugar
2 eggs
1 tsp. vanilla
1/2 c. buttermilk
1 1/2 tsp. baking powder
1/2 tsp. baking soda
 3 c. flour

Icing

4 c. powdered sugar
1 tsp. vanilla
4 to 5 Tbs. milk
assorted food coloring
assorted sprinkles

Directions

Heat oven to 350°. Grease or spray a cookie sheet.

In a mixing bowl, cream the butter, and sugar until light and fluffy.  

Add in the eggs, one at a time, beating well after each addition. 

Pour in the buttermilk and mix in well. 

Stir in the baking powder, baking soda, and flour.  Mix thoroughly until you have a stiff dough.

Cover and refrigerate for 3 hours or until easy to handle.

On a lightly floured surface, roll out dough to 1/8-inch thick. Cut with Easter shaped cookie cutters dipped in flour. Place the cookies 1 inch apart on the prepared baking sheet.  

Bake for 5-10 minutes, or until the sides of the cookies just start to turn brown.

Remove to a cooling rack and allow the cookies to cool completely before frosting them.   

In a small bowl, combine powdered sugar, vanilla and 3 tablespoons milk. Continue to add milk, beating well, until the icing is stiff enough to spread on top of your cookies. Beat until smooth. If the frosting is too thick, add a little more milk. If the frosting is too thin, just add some more powdered sugar.

Divide the icing into as many bowls as you want to make different colors for.  Cover the bowls with a sheet of plastic wrap, so it does not dry out. 

Decorate and frost the cookies as desires.  Let them stand for 30 minutes so the icing sets.  To store the cookies, place them in single layers, with waxed paper between each layer.  Store in a tightly sealed container.

Notes

If you don't want to cut the cookies out in a particular shape, simply roll the dough into walnut sized balls between the palms of your hand. Place on a prepared cookie sheet about 3-inches apart.

Friday, March 17, 2023

Vanilla Sugar Cream Pie

Vanilla Sugar Cream Pie

This is an old recipe from my grandmother on my dad's side of the family. It is an easy recipe to put together and it is so smooth, and delicious. All the ingredients are sure to be found right in your pantry.

Topping Ingredients

4 Tbs. butter, melted
1/2 c. sugar
2 tsp. cinnamon
3/4 tsp. nutmeg

Pie Ingredients

1 (9-inch) deep dish pie crust, baked
3/4 c. sugar
4 Tbs. cornstarch
1/2 tsp. salt
2 1/4 c. heavy cream or evaporated milk
4 Tbs. butter
1 Tbs. vanilla

Directions

Preheat oven to 350°.

In a bowl, combine sugar, cinnamon and nutmeg.

In a saucepan, mix sugar, cornstarch and salt. Gradually stir in heavy cream or evaporated milk and butter. Cook over medium heat, stirring constantly, until the mixture thickens, but do not bring to a boil or the mixture will curdle. This part can take between 15 and 20 minutes. Remove from heat.  

Stir in vanilla.

Pour in prepared pie shell and smooth the top to make it even. Bake for 10 minutes. Remove the pie from the oven.

Turn the oven to broil with the rack set 6 to 8-inches below the broiler.

Pour the melted butter over the top of the pie. Sprinkle the sugar cinnamon mixture over the top. 

Cover the edge of the pie crust with aluminum foil or use a pie crust guard. Put the pie in the oven and broil for 30 to 60 seconds.  You only just want to caramelize the sugar. Watch it carefully, so the sugar does not burn.

Remove from oven and allow the pie to cool at room temperature. Store in the refrigerator.

Monday, March 13, 2023

Homemade Vanilla Pudding Mix

Homemade Vanilla Pudding Mix

You can easily make smooth, creamy, delicious vanilla pudding any time you want with this handy mix. It's as easy as opening up a box of store bought pudding and dumping it in the saucepan.

Ingredients

2 3/4 c. milk powder
1 1/2 c. sugar
3/4 c. cornstarch
1 tsp. salt

Directions

In a large container that has a tight-fitting lid, combine, dry milk powder, sugar, cornstarch and salt.  Mix well. 

To make Vanilla Pudding.

In a large saucepan, combine 2 1/4 cups milk, and 1 well beaten egg. Using a whisk, mix in 1 1/4 cups of the pudding mixture until smooth. You don't want lumps in the pudding.  

Over medium heat, cook and stir until the pudding comes to a boil.  Cook and stir until the mixture is thickened. This takes about 1 or 2 minutes.  Remove from heat.

Stir in the butter and vanilla extract.

Pour into serving bowls. At this point, you can eat the pudding warm, or put it in the refrigerator to chill. If you put it in the refrigerator, cover the pudding with plastic wrap. That will prevent a skin from forming on top of the pudding.

  1. dishes; cover and chill 2-3 hours.

Friday, March 10, 2023

Oatmeal Cake

 Oatmeal Cake


This moist cake made with old-fashioned oatmeal, and spices is delicious. It is like eating an oatmeal cookie, except in the form of a cake.  This is an old recipe that came from my dad's side of the family. I remember my grandmother baking this cake and serving it when we would drop in for a visit.

Ingredients

 1 1/4 c. boiling water
1 c. oatmeal
1/2 c. butter, softened
2 eggs
1 c. granulated sugar
1 c. brown sugar
1 tsp. vanilla
1 tsp. baking soda
3/4 tsp. cinnamon
1/2 tsp. salt
1/4 tsp. nutmeg
1 1/2 c. flour

Topping

1 (8 oz.) pkg cream cheese
1/2 c. butter, melted
2 c. powdered sugar
1 tsp. vanilla
1 tsp. cinnamon

Directions

Preheat oven to 350°. Lightly grease or spray two 8-inch round cake pans or a 13 x 9-inch cake pan.

Bring water to a boil in a saucepan. Once the water is boiling, stir in the oatmeal. Remove from heat and cover with a lid. Set aside for 90 minutes. You can let them sit for 20 minutes, but the cake won't be as good.

In a large bowl, cream butter, granulated sugar and brown sugar until light, and fluffy.  Add in the eggs, one at a time, beating well after each addition. 

Mix in the vanilla and cooled oatmeal mixture. 

Stir in baking soda, cinnamon, salt, nutmeg and flour. Mix thoroughly to combine

Divide the mixture evenly between the 2 cake pans.  Smooth the tops of the cake with a spatula or the back of a spoon or knife.

Bake for 50 to 55 minutes, or until a toothpick inserted in the center comes out clean. 

It is time to make the frosting after the cake has cooled.
In a large bowl, combine cream cheese and butter.  Beat with an electric mixer until the mixture is smooth.  

Gradually add the powdered sugar, mixing until it is fully combined.

Pour in the vanilla and add the cinnamon.  With the mixer on high speed, whip the frosting for about 2 minutes, or until it is light and fluffy.

Spread the frosting over the completely cooled cake.

Monday, March 6, 2023

Homemade Cinnamon French Toast Sticks

Homemade Cinnamon French Toast Sticks

Occasionally, I would buy bags of French Toast sticks already prepared, to serve my kids for breakfast when we wanted something special. But I found they were not as good as the ones we make ourselves.  Making your own French Toast Sticks is easy. With just a few simple ingredients that you already have at home, you can quickly make your own.

Ingredients

6  slices stale white bread, cut thick
2 eggs
3/4 c. milk
dash salt
1/3 c. sugar
1 tsp. cinnamon
1 tsp vanilla
2 Tbs. butter

Directions

Cut the bread slices into 1 inch sticks.

In a medium bowl, combine eggs, milk, dash of salt, and vanilla. Beat well.

In a low sided bowl, combine cinnamon and sugar. Set aside.

In a cast iron skillet, over medium high heat, melt butter.

Working as you go, roll the bread stick in the milk mixture, but do not allow the bread to soak, or they will be very soggy. Allow the excess milk mixture to drip off back into the bowl. 

Place the French Toast stick in the skillet. You will need to work in batches and not overcrowd the skillet, soaking the bread in the milk mixture and frying them as you go. Do not soak all the pieces of bread at once, or they will not hold together and you will have a mess.  

Fry the bread, until it is golden brown. Turn the bread to cook each side until golden brown. 

Remove from the skillet and immediately roll the bread sticks in the cinnamon sugar mixture, coating all sides. Serve.

Repeat the process with the remaining bread, adding more butter as needed to keep them from sticking to the bottom of the skillet.

Serve immediately and enjoy! The French Toast Sticks can be dipped in maple syrup or whatever you like best.

Friday, March 3, 2023

Pumpkin Spice Streusel Coffee Cake

 Pumpkin Spice Streusel Coffee Cake

This Pumpkin Spice Cake is moist and full of flavor. You'll find a streusel layer made with brown sugar, butter and cinnamon in the middle and over the top. A creamy glaze is then poured over the warm cake. It's a delicious cake to serve for breakfast, dessert or anytime.

Ingredients

Streusel

1/4 c. all-purpose flour
1/2 c. finely chopped pecans (optional)
1/2 c. brown sugar
3 Tbs. butter, melted
1 tsp ground cinnamon

Cake

1/2 c. vegetable oil
2 c. flour
1/2 tsp. fine salt
1/2 tsp. cinnamon
1/4 tsp. nutmeg
1/4 tsp. ginger
1 c.  pumpkin puree
1/2 c.sour cream, room temperature
2 large eggs, beaten
1/2 c.  brown sugar
1/2 c. granulated sugar
1 tsp. baking powder
1/2 tsp. baking soda

Glaze:

2 Tbs. butter, melted
1 c. powdered sugar
1 to 2 Tbs. milk
1 tsp. vanilla

Directions

Preheat oven to 350°. Grease or spray the bottom of an 8-inch square baking pan.

Prepare the streusel. 

In a bowl, combine flour, pecans, brown sugar, butter and cinnamon together.  Mix well until the mixture is crumbly. Set aside.

In a large bowl combine flour, baking powder, baking soda, salt, cinnamon, nutmeg and ginger. Mix together and set aside.

In a medium mixing bowl, combine pumpkin puree, granulated sugar, brown sugar, oil, sour cream and eggs.  Mix thoroughly until well blended. The batter will be thick and that is fine.

Make a well in the center of the dry ingredients. Pour the pumpkin mixture into the well. Fold the ingredients together only until combined. Do not over mix. 

Pour half of the batter into the prepared pan.  Sprinkle half of the streusel over the top of the batter. Carefully spread the rest of the pumpkin batter over the top of the streusel then sprinkle the remaining streusel over the top.  Or you can just pour the entire batter into the prepared pan and then sprinkle all the streusel mixture over the top of the batter. 

Bake for about 35 minutes, or until a toothpick inserted in the center comes out clean.  Remove the cake from the oven and allow it to cool for about 30 minutes, while you make the glaze.

Melt the butter in a saucepan.  Remove from heat and allow the butter to cool for a couple of minutes. Add powdered sugar, 1 tablespoon milk and vanilla.  Whisk together until smooth.  Add more milk if the mixture is too thick.

Pour the glaze over the top of the warm, but not hot cake.

Combine melted butter, powdered sugar, 1 Tablespoon milk, and vanilla in a small bowl. Whisk until smooth, only adding additional milk if mixture is too thick. Drizzle over the top of cooled coffee cake. Slice and enjoy!

Monday, February 27, 2023

No-Bake Healthy Cookies

No-Bake Healthy Cookies


These no-bake cookies are a healthy alternative to the sugary cereals that people like to eat in the morning. Of course, these cookies will also make a healthy snack idea as well. They are so easy to make and the drizzle of chocolate is just perfect to set these apart.

Ingredients

2/3 c. peanut butter
1 1/2 Tbs. honey
1 c. oats
1/4 c. walnuts, chopped
2 Tbs. coconut
1 Tbs. sunflower seeds
2 Tbs. chocolate, chopped
1/2 tsp. coconut oil

Directions

In a bowl, combine peanut butter and honey.  Mix until well blended.

Stir in oats, walnuts, coconut, and sunflower seeds.  Mix until thoroughly combined.

Form cookies from the dough. Take about 1 1/2 tablespoons of the dough and roll it between the palms of your hands.  Place the dough ball on a sheet of parchment or waxed paper.  Flatten the dough out slightly to form a cookie. Continue forming the cookies in this manner until all the dough is used up.

In a microwave bowl, combine chocolate and coconut oil.  Microwave for 15 to 30 seconds, then stir. Repeat the process until the chocolate is melted.

Quickly drizzle the chocolate over the cookies.

When done, place in the refrigerator. Refrigerate for at least 1 hour before eating.  These healthy cookies will last between 4 and 5 days. 

Friday, February 24, 2023

Vanilla Pudding

Vanilla Pudding


One of our favorite desserts is Vanilla Pudding.  It is so smooth and creamy, pure comfort food.  Making this classic dessert is not hard at all. In fact, it is as easy as opening a box of the store-bought mix and pouring some milk in.  I have the super easy version of this pudding below in the notes that makes it even simpler.

Ingredients

2/3 c. sugar
1/3 c. cornstarch
4 c. milk
1 egg, beaten
3 Tbs. butter
2 tsp. vanilla

Directions

In a bowl, beat the egg thoroughly. Set aside.

In a heavy saucepan, combine sugar and cornstarch.  

Slowly pour in the milk, whisking constantly to keep the cornstarch from clumping or lumping.  Over medium heat, cook the pudding until it comes to a boil.  Boil for one minute. The pudding should be thicker.

Ladle some of the hot pudding into your beaten egg, whisking constantly to keep the egg from cooking. Add maybe about a half a cup of the hot pudding.  Slowly pour the egg mixture back into the hot pudding, whisking constantly.  Bring the pudding back to a bubble or a simmer and cook for 1 minute. Remove from heat.

Add butter and vanilla.  Stir until the butter melts. Serve and enjoy while the pudding is warm. Or you can refrigerate the pudding for later. Just cover the pudding with a sheet of plastic wrap, pressing it down lightly on the surface of the pudding. This keeps the pudding from forming a skin across the top.  Place in the refrigerator until ready to serve.

Serve with whipped cream if desired. 

Notes

If you want an even easier way to make this pudding, mix the sugar and cornstarch in a saucepan. Slowly pour in the milk and beaten egg into the sugar. Cook, stirring or whisking constantly, until the mixture comes to a boil. Cook and stir until the mixture is thickened. This takes about 1 to 2 minutes longer.  Just remember to constantly stir the pudding, or it will burn on the bottom of the saucepan. 

Friday, February 17, 2023

Applesauce Cake With Caramel Frosting

Applesauce Cake With Caramel Frosting


This Applesauce Cake With Caramel Frosting is an older recipe.  It is a moist and sweet treat that is full of wonderful spices like cinnamon, allspice and cloves. It does not take long to put together, and you probably have everything you need right in your pantry.

Ingredients

1 c. shortening
2 1/2 c. applesauce
2 c. sugar
1 tsp. cinnamon
1 tsp. allspice
1 tsp. cloves
1 tsp. salt
3 c. flour
3 tsp. baking soda
1 egg
1/2 c. margarine or butter
1 c. brown sugar
1/4 c. milk
2 c. powdered sugar

Directions

Preheat oven to 350°. Grease a 13 x 9-inch baking pan. 

In a large saucepan, melt the shortening.

Stir in applesauce, sugar cinnamon, allspice, cloves and salt. Mix well and heat through. Remove from heat.

Stir in flour, and baking soda. Mix thoroughly.

Beat in the egg.

Bake for 40 minutes, or until a toothpick inserted in the center comes out clean.

Frosting

In a saucepan, combine margarine or butter and brown sugar.  Cook and stir over low heat until the margarine is melted. 

Pour in milk.  Bring the mixture to a boil, stirring constantly. Remove from heat and cool.

Gradually add in the powdered sugar, beating well after each addition.  Beat with a hand held mixer until the frosting is smooth and spreading consistency.  

Frost the cooled cake.


Thursday, February 9, 2023

Sour Cream Raisin Bars

Sour Cream Raisin Bars


These Sour Cream Raisin Bars are moist and easy to make. They remind me of eating a Sour Cream Raisin Pie that my mom used to make instead of making an actual pie.. 

Ingredients

2 c. raisins
1 c. white sugar
3 eggs, beaten
2 1/2 Tbs. cornstarch
1 1/2 c. sour cream
1 tsp. vanilla
1 tsp. cinnamon
1 tsp. baking soda
1 c. brown sugar
1 3/4 c. oatmeal
1 tsp. soda
1/2 tsp salt
1 3/4 c. flour
1 c. margarine or butter, softened

Directions

Preheat oven to350°.  Grease and flour the bottom of a 9 x 13-inch pan.

In a medium saucepan, combine raisins, granulated sugar, eggs, cornstarch, sour cream, and cinnamon together. Stirring constantly, bring to a boil over medium heat. Cook and stir over medium heat, stirring constantly, until the mixture thickens. 

Stir in the vanilla. Set aside as you prepare the filling.

In a mixing bowl, combine brown sugar, oatmeal, baking soda, flour, salt and butter. Mix until thoroughly blended. 

Press two thirds of the crust mixture in the bottom of your prepared pan. 

Bake for about 5 to 7 minutes.  

Carefully smooth this over the top of the crust. 

Sprinkle the remaining third of the crust over the top of the filling.

Bake for 30 to 35 minutes. 

Allow the bars to cool before cutting.

Friday, February 3, 2023

Tapioca Pudding

Tapioca Pudding


I remember this delicious dessert from my childhood.  It was creamy and delicious. Finding this recipe in my mother's recipe box, has me wanting to go to the store and get some tapioca, so I can recreate my childhood memory.  I hope you enjoy it as much as we do.

Ingredients

1 c. water
1/2 c. small pearl tapioca
2 /12 c. milk
1/4 tsp. salt
1/2 c. sugar
2 eggs
1 tsp. vanilla
cinnamon (optional)

Directions

In a medium to large saucepan, combine the water and small pearl tapioca.  Leave the tapioca soaking in the water for at least 30 minutes or more. The pearls should be plump and have absorbed all the water.

In a small bowl, beat the eggs until frothy and mixed. Set aside.

In the saucepan of the small pearl tapioca, pour in the milk and add salt.  Cook, stirring constantly, over medium high heat.  Cook and stir until the mixture begins to simmer. 

Reduce the heat to low. Stir in the sugar. Cook and stirring constantly until the small pearl tapioca have plumped up even more, and the mixture has thickened. This takes about 5 minutes.

Slowly pour some hot tapioca pudding into the eggs, beating constantly. You don't want the eggs to cook from the hot liquid, you just want to temper them.

Slowly pour the tempered eggs back into the saucepan, stirring constantly. Turn the heat to medium and stir for 2 to 3 minutes. The mixture should thicken until you have the consistency of a pudding. It is important that the mixture does not come to a boil. 

Remove from heat and cool about 15 minutes.

Stir in the vanilla and cinnamon. Serve the tapioca pudding warm or cold.