Friday, January 22, 2021

Herb Sourdough Focaccia Bread

Herb Sourdough Focaccia Bread


This bread is so good! The downside is that it takes longer to make using sourdough starter then if you make it with yeast. This is a great way to use up the discard starter instead of throwing it away.  Besides, who can resist fresh home baked bread hot from the oven?

Ingredients

1/2 to  3/4 c. starter
2 c. very warm water
4 c. flour
3 Tbs. oil or soft butter
1 Tbs. rosemary, finely minced
2 1/2 tsp. salt
4 1/2 tsp. sugar
2 tsp. oregano
1 Tbs. basil
3 garlic cloves, minced
3 Tbs. olive oil
Salt, pepper
Parmesan cheese

Directions

In a large bowl, combine starter, warm water and 1 cup. flour. Beat with a wooden spoon for about 2 minutes.

Add the oil or butter, rosemary, salt, sugar, oregano, basil and garlic, stirring to combine. 

Add as much flour as you can stir in with a wooden spoon.  When it becomes to hard to stir, turn the dough out onto a floured surface. Knead the dough by hand, adding the rest of the flour as necessary to keep it from being really sticky.  However,you will want the dough to be a little bit sticky. Knead the dough for 8 to 10 minutes our until it is smooth and elastic.

Place the dough in a lightly oiled bowl. Turn the dough over so all sides of the dough is coated with oil to keep it from drying out. Cover the bowl and place it on the counter and allow to rest for 30 minutes.  When the half hour is up, reach into the bowl, grab one corner of the dough, pull it up and press it into the center of the dough. Turn the bowl a quarter turn and repeat the process at least 8 times. Then cover the bowl again and leave out at room temperature overnight, or 12 to 18 hours.

The next day, when the dough has doubled in size, punch the dough down to deflate it.

Pour 2 tablespoons olive oil into a 12 x 17-inch baking sheet.

Place the dough on the cookie sheet. Press the dough with your hands and fingers, until it almost covers the bottom of the cookie sheet. Pour 1 tablespoon olive oil over the top of the dough and place in in a warm location to rise until doubled. This can take approximately 4 hours or more.

After the dough has doubled in volume, you will want to dimple the dough. With oiled hands, begin  dimpling the dough with your fingertips. Stretch the dough as well until it reaches the sides of the baking sheet.

Sprinkle the top with the coarse salt, pepper, garlic powder and Parmesan cheese. You can also add other toppings like tomatoes, olives, onions, browned hamburger, crumbled cooked bacon or other cheeses. The choices are endless.

Place the pan in the oven. Set the oven to 375° and bake for approximately 20 minutes or until golden brown.

Thursday, January 21, 2021

Sourdough Biscuit Recipe

 Sourdough Biscuit Recipe

Don't throw out the discard starter if you don't want to  make bread.  You can use the discard to make Sourdough Biscuits.

Ingredients

2 cups flour
1 tsp. salt
1 1/2 tsp. baking powder
1/2 tsp. baking soda
1 stick cold butter Or margarine, butter flavored shortening
1/2 c buttermilk* or you can use whole milk
1 cup sourdough starter discard

Directions

Preheat oven to 425°. Grease a cookie sheet or baking sheet.

Mix flour, salt, baking powder, and baking soda in a large bowl.

Cut in the butter using a pastry blender or two dull knives held together in your hand. The mixture should resemble coarse crumbs or small peas when it is done. Make a well in the center of the dry ingredients.

Pour in the buttermilk and sourdough starter. Stir only until the dry ingredients are moistened and a ball starts to form. Do not over stir or the biscuits will be tough.

Turn the dough out onto a lightly floured surface and knead 10 to 12 times. If the dough is really sticky, add a little flour.

Roll out the dough until it is 1/2-inch thick. Cut with a biscuit cutter dipped in flour. You can also use a glass or a cup. Dip the rim of the glass or cup in flour so the dough does not stick to the sides. 

Place on the prepared baking sheet and bake 15-20 minutes or until golden brown. Makes 10-12 baking powder biscuits.

You can make your own buttermilk by adding a half tablespoon of vinegar to the whole milk. Allow this to sit for about 8 to 10 minutes.

Wednesday, January 20, 2021

Potato Flake Sourdough Starter

Potato Flake Sourdough Starter

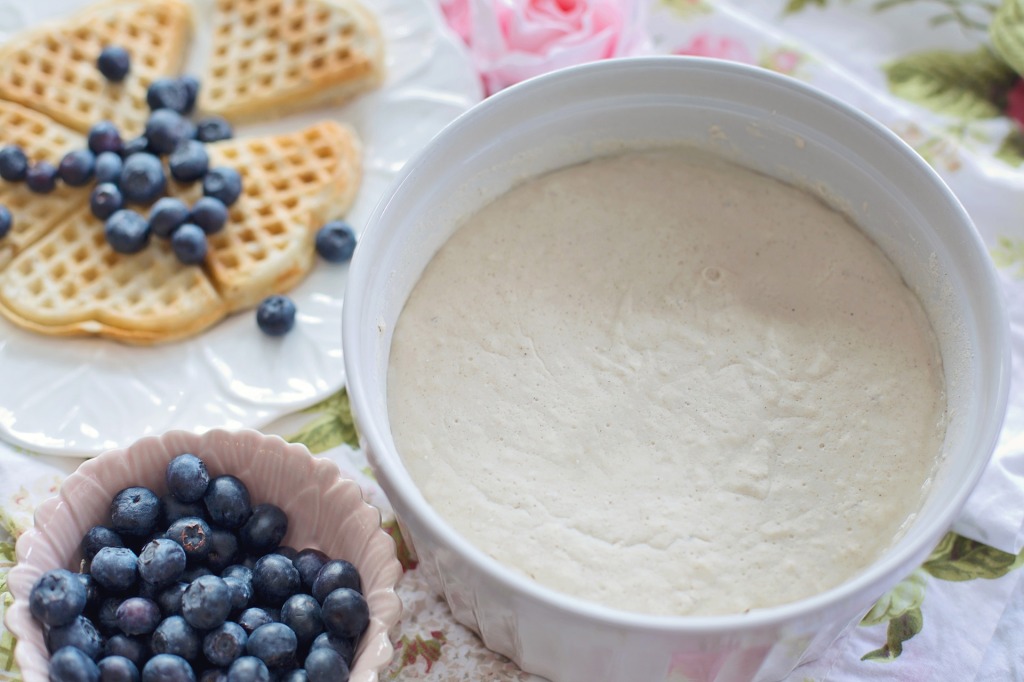
If you have a lot of instant potato flakes, you can make Potato Flake Starter. It is like the sour dough starter, except it uses instant potato flakes. It does need yeast at the beginning, but after that, you feed it every once a week with potato flakes, sugar and water.  

Ingredients

1 pkg. or 1 Tbsp. yeast
1 cup warm water (110°-115°)
1/2 cup sugar
3 Tbsp. instant potato flakes

Directions

Mix yeast, warm water, sugar and instant potato flakes in a glass jar or container. Cover loosely and let stand on the kitchen counter for 2 days. Stir daily.

Feed the starter with 1/2 cup sugar, 3 tablespoons potato flakes and 1 cup water. Stir until smooth. Leave it in a warm location, 70° to 76°, for 8 hours.

Place in the refrigerator for 3 to 5 days.

Stir the mixture well. Remove 1 cup starter to make your sour dough bread.

Feed the starter with sugar, water and instant potato flakes. Stir well. Cover loosely and leave it on the counter for 2 days, stirring daily. Place it in the refrigerator for 3 to 5 days.

Simply repeat the process of stirring the mixture well. Remove 1 cup of the starter to use for your baking, needs and then feed the starter with the potato flakes, sugar and water.

If you don’t make bread, biscuits or pancakes when you feed the starter, you will need to discard 1 cup of starter at each feeding. Or give it to a friend with directions on feeding and recipes to use it in.

Tuesday, January 19, 2021

Sourdough Bread

 Sourdough Bread

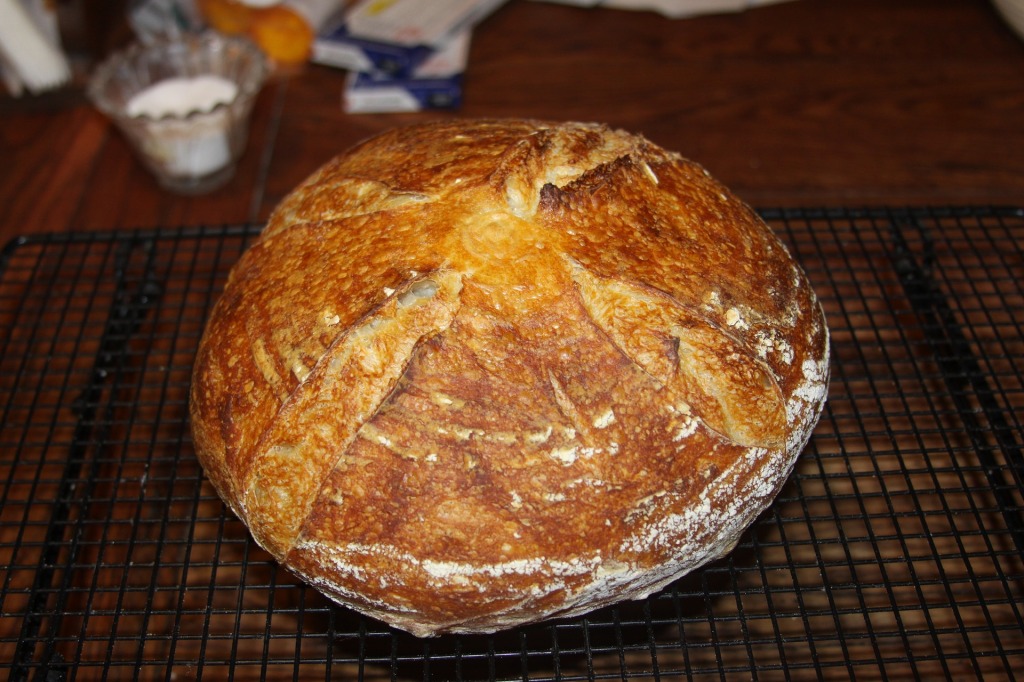
Sour dough  bread is made by using sourdough instead of yeast. It gives your bread a slightly different taste then if you used yeast, but it is still every bit as good.  This recipe takes 2 days to make a loaf of bread, so you will need to start making your bread the day before.

Ingredients

2 Tbs. sugar
1 Tbs. salt
1 tsp baking soda
2 c. water
6 to 8 c. flour
1 Tbs. melted butter or olive oil
1 c. starter

Directions

One day before you want to serve the bread.

Dissolve the soda in the warm water.

In a large bowl, combine the sugar, salt, soda, water, starter, and 3 cups flour. Beat with a mixer at medium speed until well blended.

Cover the bowl with a towel. Place the bowl in a location that is free from drafts. Let the batter rise at room temperature for at least 18 hours.

About 4 1/2 hours before serving.

Stir 3 1/2 to 4 cups flour to make a soft dough. Turn out the dough on a floured surface. Knead 8 to 10 minutes until smooth and elastic.

Cut the dough in half. Shape each piece into 2 flat, round loaves measuring about 7″ in diameter. Or shape the dough into 3 loaves. 

Place the loaves on well greased cookie sheets or in well greased loaf pans. Cover with towels and let rise in a warm location until doubled.

Preheat oven to 350°. Brush the top of the loaves with melted butter. Cut 3 to 5 slashes across the top of each loaf if you are baking them on a cookie sheet.

Bake 30 to 40 minutes until golden brown. The loaves should sound hollow when tapped.

Monday, January 18, 2021

Sourdough Starter

Sourdough Starter

Last year, yeast was very hard to find in most grocery stores.   If you like home-made bread, but you suddenly find that you can't get to the store, or the store's shelves are empty, you don't have to despair. You can still make home-made bread by using Sourdough Starter.  This starter has been known to last generations. 

Ingredients

2 c. flour
1 package active dry yeast
2 c. warm water

Mix the flour and yeast together in a 4 quart glass jar or a large bowl. Stir in water and beat until smooth.

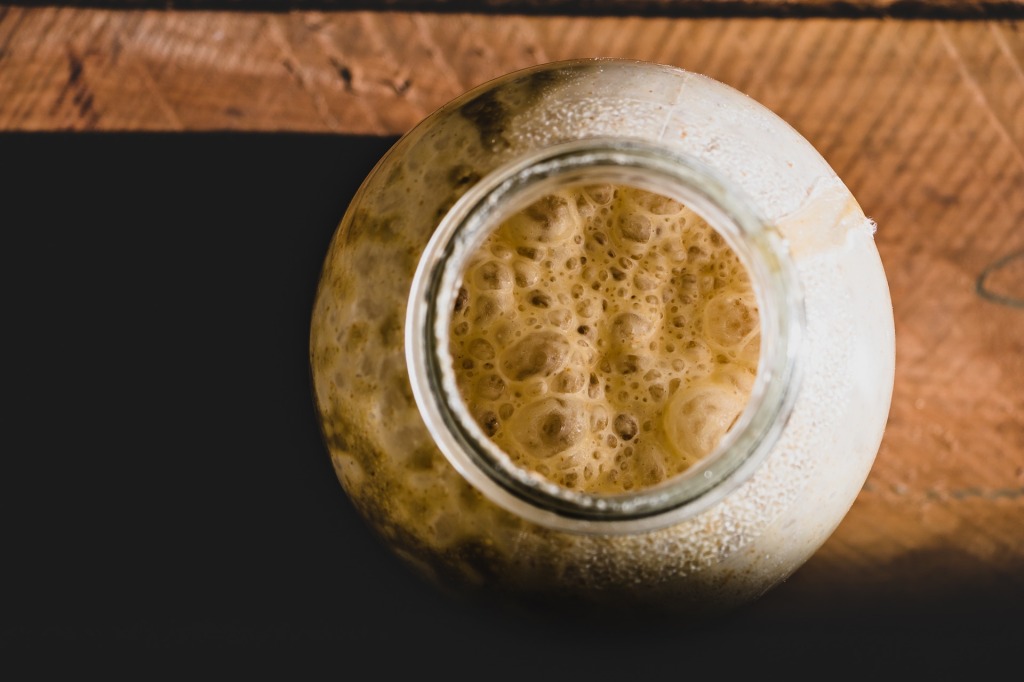
Cover loosely with a piece of plastic wrap, waxed paper or a kitchen towel. Let stand for 2 days or 48 hours in a warm location. Stir occasionally. The mixture should have a sour smell, have some bubbles and there will be some clear liquid on the top. However, if your starter turns a strange color, smells really bad or has mold on it, throw it away and start again.

When you are ready to use the starter, remove it from the refrigerator. Stir to blend the liquid that may have formed on the top. Remove the amount of starter you need to make your sourdough bread.

To replenish the starter

If you are going to be making sour dough bread once a week, you will have to give your starter some food to keep it going. You will need at least 1 cup starter left in your container and you will have a never ending supply . . .as long as you keep feeding it. 

Combine 1 cup flour with 1 cup warm water and beat until smooth. Stir into remaining starter. Leave at room temperature for a few hours until mixture begins to bubble. Cover the bowl or jar loosely and place in the refrigerator.

Remember, you will need to feed and replenish the starter once a week. If you don’t plan on using the starter for a week, discard half the mixture. Add 1/2 cup flour and 1/2 cup water into the sour dough starter and stir well.

 If throwing the starter away does not appeal to you, then place it in a container and gift it to someone who will enjoy baking sourdough bread as much as you do.You can also make biscuits, pancakes or pizza dough from it as well.

Sunday, January 17, 2021

Home-made Butternut Squash Pie

Butternut Squash Pie 


We were given butternut squash late in the fall.  Although I love to half it and bake it in the oven with butter, salt and pepper, I always have extra left over.  Instead of eating it for days, I use it to make a Butternut Squash Pie. It is just like Pumpkin Pie, but so much better.

Pie Crust Ingredients

1 c. plus 1 Tbs. flour
1/2 tsp. salt
1/3 c. shortening or lard
3 to 5 Tbs. cold water

Butternut Squash Pie Filling Ingredients

3/4 c. brown sugar
1 Tbs. cornstarch
1/1/2 tsp. cinnamon
1 tsp. ginger
1/2 tsp. nutmeg
1/4 tsp. salt
2 c. butternut squash puree  See recipe below
2 eggs
1/2 tsp. vanilla
1 (12 oz.) can evaporated milk 

Directions

Make the pie crust. In a medium bowl, combine flour and salt.  Cut in the shortening with a pastry knife or two knives held together until it resembles course crumbs about the size of small peas.

Add the cold water, one tablespoon at a time, stirring with a fork until all the flour is moistened and the pastry holds together. The water amounts vary depending on the amount of humidity in the air.

Form the pastry into a ball and place it in a plastic bag or wrap it in a sheet of plastic wrap. Refrigerate for 30 minutes. 

Remove the plastic wrap and turn the pastry out onto a lightly floured surface. With a floured rolling pin, roll the pastry out until you have a circle 2-inches larger then your inverted 9-inch pie pan.  To check the size of your pastry, turn the pie pan over so the open side is over the pastry.  If you have at least 2-inches of crust outside the rim of the pie pan, then it is the right size.

Carefully and loosely fold the crust into fourths and then place it in the pie pan. Unfold the pastry and position it so you have ample crust hanging over the rim and it is flush against the bottom and sides of the pie pan. Be careful at this point not to stretch the pastry. This causes the pastry to shrink while it is being baked. 

Flute the edge of the pastry as desired..

Bake pie crust at 350° for 1-2 minutes until crust starts to puff with small bubbles. This prevents the crust from being soggy.  Set aside to cool while you make the butternut squash pie filling.

In a large mixing bowl, combine the brown sugar, cornstarch, cinnamon, ginger, nutmeg, and salt. Mix to combine. 

Add the butternut squash puree, eggs and vanilla.  Stir until it is thoroughly blended together.

Pour in the can of evaporated milk, stirring to combine. 

Pour into prepared pie shell. 

Bake at 350° for 75 to 80 minutes or until  a  knife inserted in the center of the pie comes out clean.

Butternut  Squash Puree

Cut the butternut squash in half lengthwise. Scoop out the seeds and stringy stuff.

Place the cut side down on a baking sheet/  

Bake at 350° for 30 to 40 minutes or until tender. Scoop out the pulp while it is still warm and place in a bowl, leaving the outside peel. 

Place the pulp in a blender, food processor or use an emulsion blender.  Add 1 tablespoon butter and blend until it is smooth and silky.

Refrigerate leftovers up to 3 days. Or you can freeze leftovers for up to 3 months. When you want to use the frozen Butternut squash puree, simply thaw overnight in your refrigerator.


Saturday, January 16, 2021

Pineapple Hawaiian Dinner Rolls

Pineapple Hawaiian Dinner Rolls


These dinner rolls have just the right amount of sweetness, making them perfect for sliders, an accompaniment for any meal, or as a wonderful snack. They bake up fluffy and light, with a sweetness and unique flavor provided by the crushed pineapple.

Ingredients

1 Tbs. dry yeast
1/4 c. warm water
1 Tbs. granulated sugar
1/3 c. milk powder
1 egg
1/4 c. brown sugar
1 (8 oz.) can crushed pineapple, undrained
3 Tbs. butter, softened or oil
1 tsp. salt
3 1/4 c. flour

Directions

In a large bowl, mix yeast, warm water, and granulated sugar together.  Set in a warm location, so the yeast can bloom and grow for 8 to 10 minutes. 

Add milk powder, egg, brown sugar, crushed pineapple, butter, salt and 1 cup of flour.  Beat with a wooden spoon, or you can use a mixer with a dough hook attached, for about 2 minutes. This helps with the kneading process.

Continue to add and stir in as much of the flour as you can using a wooden spoon.  When it gets too hard to stir, place the dough onto a lightly floured surface.  Knead in the remaining flour, adding more if necessary, until you have a dough ball that is smooth and elastic. The dough should be slightly sticky, but no longer sticking to your fingers. This process usually takes about 10 minutes.

In the bowl you made the dough in, lightly grease the inside. Place dough in the bowl, turning once to grease all the dough's surface. Cover with a towel or plastic wrap and place in a warm location until doubled in size.  This take about an hour, depending on how warm your kitchen is. 

Punch the dough down and allow it to rest for 10 minutes on a lightly floured surface.  As the dough rests, grease a 9 x 13-inch baking pan.

Form the dough into 12 portions.  Roll each portion into a ball under the palm of your hand on a smooth surface. Place in the prepared baking pan. 

Lightly brush the tops with oil to keep them from drying out. Cover and place in a warm location until doubled in size.  This takes about an hour. 

Preheat oven to 375°. I often have my rolls rising in the oven with the pilot light. Then, when it comes time to bake, I turn the oven on. Bake for 15 minutes, or until the tops are done and are lightly golden brown.

Brush the tops of the hot rolls with butter.  For this step, I will take a stick of butter, open one end and then run the stick of butter over the top. 

Serve with butter. Or combine 2 tablespoons honey with 2 tablespoons melted butter for extra sweetness and flavor.