Showing posts with label Cookies. Show all posts

Friday, September 18, 2026

A Taste of Fall: Mom's Cinnamon Sugar Pumpkin Cookies

A treasured family recipe filled with pumpkin, warm spices, and sweet cinnamon sugar.

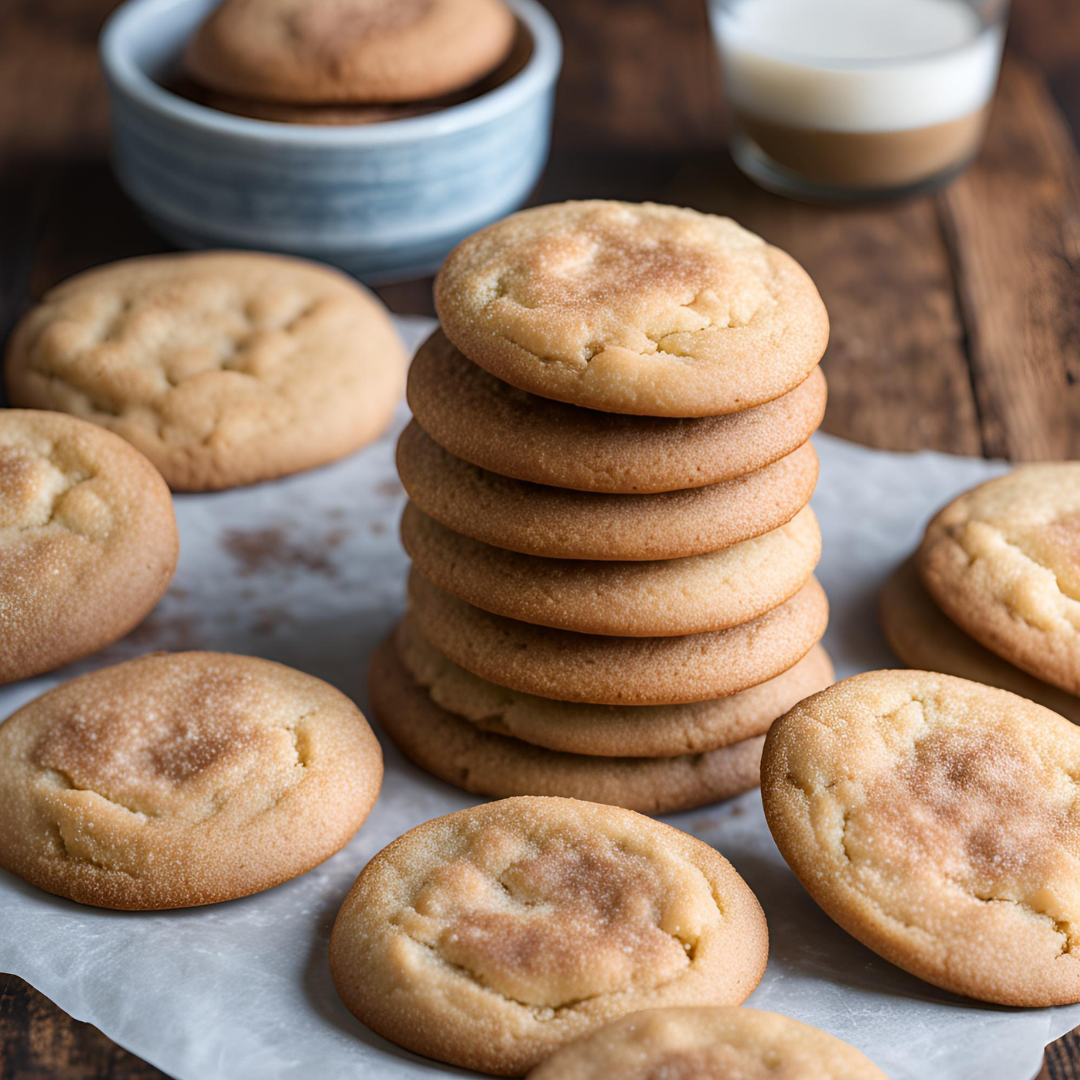
Homemade pumpkin spice cookies rolled in cinnamon sugar, with a soft texture and warm fall spices, arranged on a plate for an autumn treat.

Today marks my 1,003rd published recipe on Money Saving Recipes! I want to take a moment to express my heartfelt gratitude to everyone who has visited my blog, tried my recipes, shared them with others, or simply stopped by to read. Thank you for being part of this journey!

Even though it isn't officially fall yet, you can feel the change in the air. Today, the rain is gently falling from the sky, helping prepare everything for the changing seasons.

This is the time of year when I start thinking about pumpkins. Not just pumpkin pie, but all the other delicious treats you can make with pumpkin.

My mom used to make these wonderful pumpkin cookies. They had a rich pumpkin flavor, with all those delicious warm spices mixed in. She would form the dough into balls and roll them in a cinnamon sugar mixture before baking. They were so good!

Recently, I came across her handwritten recipe tucked inside an old recipe book. She had been using it to mark the page of another recipe she wanted to try. What a treat it was to find it again!

These cookies bring back sweet memories of my mom and her love of cooking. I hope you enjoy making them as much as I do, and that they become a family favorite in your home, too.

Ingredients:

For the Pumpkin Cookies:
1 1/2 c. brown sugar
1/2 c. butter, softened to room temperature
1 c. pumpkin puree
1 egg
1 tsp. vanilla extract
1 tsp. baking soda
1 tsp. baking powder
1 tsp. cinnamon
1/2 tsp. nutmeg
1/2 tsp. ginger
1/2 tsp. salt
1/4 tsp. all spice
1/4 tsp. cloves 
2 1/2 c. flour

For the Cinnamon Sugar Coating:
2 Tbs. brown sugar
2 Tbs. granulated sugar
1 tsp. cinnamon 

Directions:

 Preheat the oven to 350°F. Lightly grease your baking sheets or line them with parchment paper.

In a large mixing bowl, beat the softened butter and brown sugar together until light and fluffy.

Mix in the pumpkin puree, egg, and vanilla extract until smooth and well combined.

Stir in the baking soda, baking powder, cinnamon, nutmeg, ginger, salt, all spice, and cloves.  Mix until thoroughly combined. 

Gradually blend the flour into the pumpkin mixture, mixing just until everything is combined. The dough will be soft, but it should hold its shape when rolled into a ball. If it is too soft to handle, refrigerate it for 15–20 minutes.

In a small bowl, combine the brown sugar, granulated sugar, and cinnamon. Stir until evenly mixed.

Scoop out the dough using a tablespoon or cookie scoop. Gently roll each portion between your palms to form a ball.

Roll each ball in the cinnamon sugar mixture until coated on all sides.

Place the coated dough balls on the prepared baking sheets, leaving about 2 inches between each cookie.

Bake for 12–15 minutes, or until the edges are set and firm. For a slightly crisper cookie, bake a little longer, keeping a close eye on them to prevent overbaking.

Let the cookies rest on the baking sheet for a few minutes before transferring them to a wire rack to cool.

Enjoy these delicious pumpkin cookies with a cup of coffee, tea, or a glass of cold milk!

Tips for Best Success:

  • Use pumpkin puree, not pumpkin pie filling. Pumpkin pie filling already contains added sugar and spices, which will change the flavor and sweetness of the cookies.
  • Use softened butter. Butter that is soft enough to beat easily will help create a smooth, well-combined dough.
  • Measure the flour carefully. Too much flour can make the cookies dry. Spoon flour into your measuring cup and level it off rather than packing it down.
  • Chill the dough if needed. Pumpkin cookie dough can be soft because of the moisture in the pumpkin. Refrigerating it for 15–20 minutes can make it easier to roll.
  • Make evenly sized cookies. Using a tablespoon or cookie scoop helps the cookies bake at about the same rate.
  • Leave space between the cookies. About 2 inches gives them room to bake without running together.
  • Watch the baking time. For soft cookies, remove them when the edges are set. They will continue to firm up as they cool.
  • Let them cool before storing. Allowing the cookies to cool completely helps prevent condensation from making them soggy.

Variations and Substitutions:

  • Add chopped nuts: Stir in 1/2 cup of chopped pecans or walnuts for a little crunch.
  • Add chocolate chips: Mix in 1/2 cup of chocolate chips for a delicious pumpkin and chocolate combination.
  • Add raisins: Stir in 1/2 cup of raisins for a traditional, old-fashioned touch.
  • Make them extra cinnamony: Add a little extra cinnamon to the coating if you enjoy a stronger cinnamon flavor.
  • Try a different spice blend: If you don't have all the individual spices, you can substitute pumpkin pie spice for the cinnamon, nutmeg, ginger, allspice, and cloves. The flavor will vary depending on the blend. Keep the salt, baking soda, and baking powder as written.
  • Adjust the coating: You can use all granulated sugar in the cinnamon sugar mixture if you don't have brown sugar available. The brown sugar adds a little extra caramel-like flavor.

Serving Suggestions:

These cinnamon sugar pumpkin cookies are delicious on their own, but here are a few ways to enjoy them:

Serve with:

  • A hot cup of coffee or tea on a cool fall morning.
  • Enjoy with a glass of cold milk for an afternoon snack.
  • Add them to a fall dessert tray with apple crisp, brownies, or other homemade cookies.
  • Serve them after dinner as a simple seasonal dessert.
  • Pack them in lunchboxes or take them along for an autumn outing.

They are also a lovely homemade treat to share with family, friends, and neighbors.

How to Store:

  • Room temperature: Once completely cooled, store the cookies in an airtight container at room temperature. For the best quality, enjoy within 3 to 4 days.
  • Refrigerator: If your kitchen is particularly warm or you prefer to refrigerate them, store the cookies in an airtight container. Allow them to come to room temperature before serving for a softer texture.
  • Freezer: Place completely cooled cookies in a freezer-safe container or bag, separating layers with parchment paper. Freeze for up to 2 to 3 months for best quality. Thaw at room temperature before serving.

Frequently Asked Questions:

Can I use canned pumpkin puree?
Yes! Canned pumpkin puree works well in this recipe. Make sure you use plain pumpkin puree rather than pumpkin pie filling.

Why is my pumpkin cookie dough so soft?

Pumpkin contains a good amount of moisture, which makes the dough softer than many traditional cookie doughs. If it is too soft to roll, refrigerate it for 15 to 20 minutes before shaping.

Do I have to roll the cookies in cinnamon sugar?

The cinnamon sugar coating is part of what makes Mom's cookies special, but you can leave it off if you prefer. The cookies will still have the warm pumpkin spice flavor.

How do I know when the cookies are done?

The edges should look set and firm, while the centers may still feel soft. They will continue to firm up as they cool. Bake a little longer if you prefer a crisper cookie.

Can I make the dough ahead of time?

Yes. You can prepare the dough and refrigerate it until you are ready to bake. If it becomes very firm, let it sit at room temperature briefly until it is easy to scoop and roll.

Can I make these cookies without the cinnamon sugar coating?
Yes. You can bake the dough balls without rolling them in the coating. The cookies will still be full of pumpkin and warm spice flavor, although they won't have the same sweet cinnamon sugar exterior.

A Little Note From My Kitchen:

Finding Mom's handwritten recipe was such a special surprise. Recipes have a wonderful way of bringing back memories of the people who made them for us.

I hope these pumpkin cookies bring a little warmth and happiness to your kitchen, too. And thank you again for visiting Money Saving Recipes and being part of my journey to 1,003 recipes!

Friday, August 21, 2026

Lemon Oatmeal Cookies – Light, Crispy and Bursting With Lemon Flavor

 A treasured family recipe made with fresh lemons and finished with a sweet lemon glaze.

Light and crispy homemade lemon oatmeal cookies topped with a sweet lemon glaze, arranged on a rustic farmhouse table.

These Lemon Oatmeal Cookies are a wonderful little family recipe with a special story behind them. The recipe came in a box of lemons that my uncle sent to my mother, and it quickly became one of those recipes worth keeping.

The cookies are light and crispy with a bright burst of fresh lemon in every bite. The oatmeal adds a little texture while the lemon glaze on top gives them even more fresh lemon flavor.

They are simple enough to make for an everyday treat but pretty enough to serve when company comes. If you love lemon desserts, these cookies are definitely worth trying.

Ingredients: 

For the Cookies:
1 1/2 c. old-fashioned oatmeal
1 c. butter, unsalted and softened
1 c. sugar
1 Tbs. lemon zest
2 Tbs. lemon juice
3/4 tsp. baking soda
1/4 tsp. salt
1 c. flour

Glaze:
1/2 c. powdered sugar
3 Tbs. lemon juice
2 Tbs. lemon zest
1/3 c. sugar for pressing the cookies 

Directions:

Preheat your oven to 350°F. Lightly spray your baking sheets with nonstick cooking spray or line them with parchment paper.

In a large mixing bowl, combine the softened butter and granulated sugar. Beat on high speed until the mixture is light and fluffy.

Add the lemon zest and lemon juice. Beat until well combined.

Add the dry ingredients. Mix in the baking soda and salt.

Gradually add the flour, mixing after each addition until it is fully incorporated.

Stir in the old-fashioned oatmeal until evenly distributed throughout the dough.

Place the 1/3 cup of granulated sugar in a shallow dish.

Using a tablespoon or small cookie scoop, scoop out the dough and roll each portion between your palms to form a ball.

Roll each dough ball in the granulated sugar, coating all sides.

Arrange the dough balls on the prepared baking sheets, leaving about 3 inches between them to allow room for spreading.

Dip the bottom of a drinking glass into the sugar, then gently press down on each dough ball to slightly flatten the top. 

Repeat with the remaining cookies, dipping the glass in sugar as needed to prevent sticking.

Bake for about 10 minutes, or until the edges are just beginning to turn golden brown.

Be careful not to overbake them if you want to keep their light, crisp texture.

Allow the cookies to cool on the baking sheet for a few minutes, then transfer them to a wire rack to cool completely.

Once the cookies have cooled, combine the powdered sugar, lemon juice, and lemon zest in a small bowl. Stir until smooth.

Dip the top of each cooled cookie into the lemon glaze.

Return the glazed cookies to the wire rack and allow the glaze to harden before serving.

Tips for Best Success:

  • Use fresh lemons. Freshly squeezed lemon juice and freshly grated zest give these cookies their best flavor.
  • Soften the butter properly. The butter should be soft enough to beat easily with the sugar but not melted.
  • Don't overbake. The cookies should just begin turning golden around the edges. Overbaking can make them harder than intended.
  • Give them room to spread. These cookies spread as they bake, so the 3-inch spacing is important.
  • Use sugar on the glass. Dipping the bottom of the glass in sugar keeps it from sticking to the cookie dough.
  • Cool completely before glazing. If the cookies are still warm, the lemon glaze can become too thin and run off.
  • Let the glaze harden. Give the glazed cookies time to set before stacking or storing them.

Variations and Substitutions:

  • More lemon flavor: Add a little extra lemon zest to the cookie dough or glaze.
  • Meyer lemons: If you have Meyer lemons, they can be used for a slightly sweeter, more delicate lemon flavor.
  • Quick oats: Quick oats can be substituted for old-fashioned oats, although the texture will be a little softer and less hearty.
  • Orange oatmeal cookies: Substitute orange zest and orange juice for the lemon to make a delicious orange version.
  • Lime cookies: Fresh lime juice and zest can be used for a bright lime variation.
  • Extra glaze: If you like a generous amount of glaze, simply make a little more. The cookies are delicious with plenty of lemon icing on top.
  • A touch of vanilla: A small amount of vanilla extract can be added to the dough for another layer of flavor.

Serving Suggestions:

These Lemon Oatmeal Cookies are wonderful with a cup of coffee or tea. They also make a nice light dessert after lunch or dinner.

For a pretty dessert tray, serve them alongside other homemade cookies and bars. Their bright lemon flavor also makes them especially nice for spring and summer gatherings, showers, picnics, and family get-togethers.

How to Store:

  • Store the completely cooled cookies in an airtight container at room temperature for several days.
  • If stacking the cookies, make sure the lemon glaze has completely hardened first. Place parchment or wax paper between layers if needed to keep the glazed tops from sticking together.
  • For longer storage, the cookies can be frozen in an airtight, freezer-safe container. Thaw them at room temperature.

Frequently Asked Questions:

Can I use bottled lemon juice?
Fresh lemon juice is recommended because it gives the cookies a brighter, fresher lemon flavor, especially since lemon is the main flavor of the recipe.

Can I use quick oats instead of old-fashioned oatmeal?

Yes. Quick oats will work, although they will give the cookies a somewhat softer texture.

Why do I need to leave so much space between the cookies?
The dough spreads as it bakes. Leaving about 3 inches between the dough balls helps keep the cookies from spreading into one another.

Why do I roll the dough in sugar?

The sugar coating adds a delicate crispness and a little extra sweetness to the outside of the cookies.

Can I skip the glaze?

You can, but the lemon glaze adds a wonderful burst of fresh lemon flavor. It is especially good on these lightly flavored, crispy cookies.

How do I keep the cookies crispy?

Allow them to cool completely before storing them and keep them in an airtight container at room temperature. Avoid storing them while they are still warm.

Can I freeze Lemon Oatmeal Cookies?

Yes. Allow the cookies and glaze to set completely, then freeze them in an airtight freezer-safe container. Separate layers with parchment paper.

Friday, July 10, 2026

Vintage Brown Sugar Cinnamon Cookies

A treasured family cookie recipe passed down from my aunt’s kitchen.

Soft brown sugar cookies with crackled tops and a cinnamon sugar coating arranged on a vintage plate.

One of our family's favorite cookies is this old-fashioned brown sugar cookie recipe from my aunt, who loved to bake. These cookies are wonderfully soft and chewy with delicate crackled tops that remind me of ginger snap cookies. Their rich brown sugar flavor makes them a comforting treat any time of the year.

For a long time, this recipe was one of my aunt's special recipes. Then one day, she surprised my mom by mailing her a handwritten recipe card with the ingredients and directions. Thankfully, my mom tucked that treasured card into her recipe box, where it has remained for years. 

These cookies have a rich brown sugar flavor with just a hint of molasses and cinnamon. They’re simple, comforting, and the kind of cookie that disappears quickly from the cookie jar.

Ingredients:

3/4 c. butter
1 1/4 c. brown sugar 
1 large egg, at room temperature
2 tsp. pure vanilla extract  
2 tsp. molasses
1 tsp. baking soda
1 1/2 tsp. cornstarch
1/2 to 1 tsp. cinnamon 
1/4 tsp. salt
2 1/2 c. flour 
1/3 c. granulated sugar, for rolling

Directions:

Preheat the oven to 350°F. Line several large baking sheets with parchment paper or lightly grease them.

In a large bowl, beat the butter and brown sugar together until light and fluffy.

Add the egg, vanilla extract, and molasses. Beat until well combined.

Reduce the mixer speed to low. Mix in the baking soda, cornstarch, cinnamon, and salt.

Gradually add the flour, mixing just until combined. The dough will be soft but thick.

Cover the bowl with plastic wrap and refrigerate for at least 3 hours.

When ready to bake, pour the granulated sugar into a small bowl.

Scoop the dough into 1-inch balls and roll each one in the sugar until evenly coated. If the dough is too firm after chilling, let it sit at room temperature for about 15 minutes before scooping.

Place the cookie dough balls about 2 inches apart on the prepared baking sheets.

Bake for 10 to 11 minutes, or until the edges are set, and small cracks begin to appear on top. The centers may still look slightly soft.

Allow the cookies to cool on the baking sheet for 5 to 10 minutes, then transfer them to a wire rack to cool completely.

Store the cooled cookies in an airtight container. 

Tips for Best Success:

  • Chill the dough for at least 3 hours. This helps prevent spreading and creates the signature crackled tops.
  • Use room-temperature butter and egg for easier mixing and a smoother dough.
  • Measure the flour correctly by spooning it into the measuring cup and leveling it off.
  • Don’t overbake. The centers should still look slightly soft when you remove them from the oven.
  • Roll generously in sugar to create a sparkling exterior and encourage the crackled appearance.
  • Let the cookies cool on the baking sheet for several minutes before moving them.
  • For extra chewiness, use dark brown sugar instead of light brown sugar.

Variations and Substitutions:

  • Add 1/4 teaspoon ground ginger and a pinch of cloves for a gingerbread-style flavor.
  • Stir in 1 cup chocolate chips.
  • Add 1/2 cup chopped pecans or walnuts.
  • Replace the molasses with 2 teaspoons maple syrup.
  • Mix 1 teaspoon cinnamon into the sugar used for rolling.
  • If using salted butter, reduce the added salt to 1/8 teaspoon.

Serving Suggestions:

These soft brown sugar cookies are delicious served with:

  • A glass of cold milk
  • Hot coffee
  • Black tea or chai tea
  • Vanilla ice cream
  • Hot chocolate
  • Caramel sauce for dipping
  • A holiday cookie tray
  • After-school snacks
  • Lunchbox treats
  • Christmas cookie exchanges

How to Store:

  • Store in an airtight container for 5 to 7 days.
  • Freeze baked cookies in a freezer-safe container for up to 3 months.
  • To freeze the dough, roll the dough into balls, coat in sugar, and freeze on a baking sheet. Transfer to a freezer bag and bake from frozen, adding 1–2 extra minutes.
  • To help maintain softness, add a slice of bread to the cookie container.

Frequently Asked Questions:

Why do these cookies crack on top?
The chilled dough and sugar-coating create the beautiful crackled tops as the cookies bake.

Can I skip the chilling time?

You can, but the cookies will spread more and won’t be as thick and chewy.

What does the cornstarch do?

Cornstarch helps create a softer, more tender cookie texture.

Can I make larger cookies?

Yes. Use larger dough balls and increase the baking time by 1–3 minutes.

Can I use dark brown sugar?

Absolutely. Dark brown sugar gives the cookies a deeper caramel flavor and extra chewiness.

How do I know when they’re done?

The edges should be set and the tops should have small cracks. The centers may still look slightly soft. 


Friday, July 3, 2026

Aunt's Chewy Brown Sugar Chocolate Chip Bars

Soft, chewy cookie bars made with brown sugar, chocolate chips, and sweet dates from my family's recipe box.

Freshly baked chocolate chip date bars cut into squares and arranged on a vintage white plate with a glass of milk on a rustic farmhouse table.

These easy bar cookies were one of my mother's favorites to make. The recipe came from my aunt, who loved baking cookies, sweet rolls, and other homemade treats for family and friends.

The original recipe calls for walnuts, but Mom usually left them out. Sometimes nuts were simply too expensive, and other times she didn't have the time to shell them herself. Even without the nuts, these bars were wonderfully soft, chewy, and full of rich brown sugar flavor.

The combination of chocolate chips and dates may sound a little unusual today, but it creates a delicious old-fashioned cookie bar that's moist, sweet, and hard to resist. They're perfect for lunch boxes, holiday cookie trays, or an afternoon cup of coffee.

Ingredients:

1/3 c. butter, softened or shortening
1 1/2 c. brown sugar
2 eggs
1 1/4 tsp. baking powder
1/4 tsp. salt
1 1/4 c. flour
1/2 c. chocolate chips
1/2 c. walnuts (optional)
1/2 c. c. chopped, pitted dates, or raisins

Directions:

Preheat the oven to 350°F. Grease or butter an 8-inch or 9-inch square baking pan.

In a large mixing bowl, cream together the butter (or shortening) and brown sugar until light and fluffy.

Beat in the eggs, one at a time, mixing well after each addition.

Stir in the baking powder and salt.

Gradually add the flour, mixing just until combined. Be sure to scrape down the sides and bottom of the bowl as needed.

Fold in the chocolate chips, walnuts (if using), and chopped dates or raisins.

Spread the batter evenly into the prepared pan.

Bake for 30 to 35 minutes, or until the top is lightly golden, and a toothpick inserted near the center comes out with a few moist crumbs.

Let the bars cool until just warm, then cut into squares.

Tips for Best Success:

  • Use room temperature butter and eggs. They cream together more easily and create a softer texture.
  • Pack the brown sugar. This gives the bars their rich, chewy texture.
  • Don't overmix the batter. Mix just until the flour disappears to keep the bars tender.
  • Chop the dates into small pieces. This helps distribute their sweetness evenly throughout the bars.
  • Use parchment paper. Lining the pan makes it easy to lift the bars out for cutting.
  • Don't overbake. The center should still be slightly soft when you remove the pan from the oven. The bars will continue to set as they cool.

Variations and Substitutions:

  • Replace the walnuts with chopped pecans for a slightly sweeter flavor.
  • If you don't have dates, raisins work just as well.
  • Mix in ½ teaspoon ground cinnamon for a warm, cozy flavor.
  • Try milk chocolate, dark chocolate, or white chocolate chips.
  • Fold in ½ cup sweetened shredded coconut for extra texture.

Serving Suggestions:

These old-fashioned cookie bars are wonderful served with:

  • A cold glass of milk
  • Hot coffee
  • Tea
  • Hot chocolate
  • Vanilla ice cream
  • Fresh strawberries or raspberries
  • A scoop of whipped cream
  • Packed into school lunches
  • Holiday cookie trays
  • Church suppers and bake sales

How to Store:

  • Store in an airtight container for up to 5 days at room temperature.
  • Store in the refrigerator for up to 1 week in a sealed container.
  • Freeze the bars in layers separated by parchment paper for up to 3 months.  Allow to thaw at room temperature before serving.

Frequently Asked Questions:

Can I leave out the walnuts?
Yes! My mom usually did, and the bars were still soft and delicious.

Can I substitute raisins for the dates?

Absolutely. Both work beautifully in this recipe.

Can I double the recipe?

Yes. Double the ingredients and bake in a 9 × 13-inch pan. You may need to add 5 to 10 minutes to the baking time.

How do I know when they're done?

The top should be lightly golden, and a toothpick inserted near the center should come out with a few moist crumbs.

Can I freeze these bars?

Yes. They freeze very well for up to three months.

What kind of chocolate chips work best?

Semi-sweet chocolate chips give the bars a classic old-fashioned flavor, but milk or dark chocolate are also delicious.

Friday, June 19, 2026

Old-Fashioned Honey Ginger Cookies

Sweet honey and warm spices make these cookies impossible to resist. 

Soft honey spice cookies coated in sugar and arranged on a rustic cooling rack beside a jar of honey.

This recipe comes from my grandmother, who somehow managed to keep a large family fed while still finding time to bake wonderful treats. Her kitchen was often filled with the comforting aroma of freshly baked cookies, breads, and cakes.

These honey spice cookies were one of her simple but delicious recipes. Made with brown sugar, honey, ginger, cinnamon, and cloves, they have a warm flavor that's perfect any time of year. The coating of granulated sugar gives them a lightly crisp exterior while the centers remain soft and tender.

It's amazing how a handful of basic pantry ingredients can create a cookie that's been enjoyed by generations of family members.

Ingredients:

1 c. brown sugar, packed
1/2 c. butter or shortening
1 egg
1/4 c. honey or dark corn syrup
1 1/2 tsp. baking powder
1 1/2 tsp. soda
1 tsp. ginger
1/2 tsp. salt
1/2 tsp. cinnamon
1/4 tsp. cloves
2 1/4 c. flour
Granulated sugar

Directions: 

Preheat the oven to 350°F. Line baking sheets with parchment paper.

In a large mixing bowl, cream together the brown sugar and butter until light and fluffy.

Add the egg and honey. Mix until well combined.

Stir in the baking powder, baking soda, ginger, salt, cinnamon, and cloves.

Gradually add the flour and mix until a soft dough forms.

Roll the dough into 1-inch balls.  Roll each dough ball in granulated sugar until coated.

Place the cookies about 2 inches apart on the prepared baking sheets.

Bake for 12 to 15 minutes, or until lightly golden around the edges.

Allow the cookies to cool on the baking sheet for 5 minutes before transferring to a wire rack.  Cool completely before storing.

Makes about 2 dozen cookies.

Tips for Best Success:

  • Let the butter soften before mixing for easier creaming.
  • Measure flour correctly by spooning it into the measuring cup and leveling it off.
  • Avoid overmixing once the flour is added.
  • For softer cookies, remove them from the oven when the centers still look slightly soft.
  • Allow the cookies to cool on the baking sheet before moving them.
  • Use fresh spices for the best flavor.

Variations and Substitutions:

  • Replace the honey with molasses for a stronger gingerbread flavor.
  • A teaspoon of orange zest adds a lovely citrus note.
  • Bake an extra minute or two for a crispier cookie.
  • Stir in ½ cup finely chopped walnuts or pecans.
  • Top cooled cookies with a simple powdered sugar glaze.
  • Buckwheat or wildflower honey adds deeper flavor.

Serving Suggestions:

These cookies are delicious with:

  • Coffee
  • Hot tea
  • Hot chocolate
  • Milk
  • Apple cider
  • Vanilla ice cream


Perfect for:

  • Holiday cookie trays
  • Cookie exchanges
  • Bake sales
  • Afternoon snacks
  • Lunch boxes
  • Family gatherings

How to Store:

  • Store in an airtight container for up to 1 week at room temperature.
  • Store in the refrigerator for up to 2 weeks.
  • Freeze baked cookies for up to 3 months.
  • The dough can be rolled into balls and frozen before baking.

Frequently Asked Questions:

Can I use shortening instead of butter?
Yes. The recipe was originally written for either butter or shortening.

Can I use dark corn syrup instead of honey?

Yes. Both work well and produce slightly different flavors.

Are these cookies soft or crispy?

They are mostly soft with lightly crisp edges.

Can I make the dough ahead of time?

Yes. Refrigerate the dough for up to 2 days before baking.

Why roll the cookies in sugar?

The sugar coating adds sweetness, sparkle, and a slightly crisp exterior.

Can I freeze the cookies?

Absolutely. They freeze very well. 

Friday, May 29, 2026

Old-Fashioned Peanut Butter No Bake Cookies

Creamy peanut butter and oats come together in these easy no bake cookies.  A quick homemade treat from my mother’s old newspaper recipe collection.

Old-fashioned peanut butter no bake cookies cooling on wax paper on a rustic farmhouse kitchen table

When the weather turned warm, my mother liked making simple desserts that didn’t require heating up the kitchen. These peanut butter no bake cookies came from an old newspaper clipping she saved and often used during the busy summer months.

She spent so much time gardening, canning, and keeping up with things around the house that quick recipes like this became family favorites. They came together fast, used simple pantry ingredients, and always disappeared quickly from the cookie plate.

One thing I always remember about this recipe card is that the original newspaper recipe called for 3 cups of sugar, but my mother thought they were much too sweet. She crossed out the “3” and wrote a “2” beside it instead. Our family always made them with 2 cups of sugar, but if you prefer sweeter old-fashioned no bake cookies, you can still use the full 3 cups from the original recipe.

The combination of creamy peanut butter and oats makes these cookies rich, chewy, and comforting in the best old-fashioned way. 

Ingredients: 

2 c. white sugar or 1 c. granulated sugar and 1 c. brown sugar OR
3 cups sugar for the original sweeter version
3/4 c. butter
3/4 c. milk
1 1/2 c. peanut butter
1/2 tsp. vanilla extract
4 1/2 c. quick-cooking oats or old fashioned oats

Directions:

Line countertop or baking sheets with waxed paper.

In a large heavy-bottomed saucepan over medium heat, combine sugar, butter, and milk.  Cook, stirring constantly, until mixture reaches a full rolling boil.  Continue boiling for exactly 1 minute while stirring constantly.  Remove saucepan from heat.

Stir in peanut butter and vanilla until smooth.  Add oats and stir until fully coated and mixture begins to slightly cool.

Drop by teaspoonfuls onto waxed paper.

Let cookies cool completely until set.

Tips for Best Success:

  • Boil exactly 1 minute so cookies set properly
  • Use quick oats for softer cookies
  • Old-fashioned oats make chewier cookies
  • Work quickly once oats are added
  • Let cookies cool completely before stacking

Variations and Substitutions:

  • Add cocoa powder:  For classic chocolate peanut butter no bakes
  • Use crunchy peanut butter:  Adds extra texture
  • Add coconut:  Stir in shredded coconut
  • Add chopped nuts:  Peanuts or pecans work well
  • Use almond butter:  For a different flavor variation

Serving Suggestions:

Serve with:

  • Cold milk
  • Hot coffee
  • Iced tea
  • Vanilla ice cream
  • Summer picnic desserts 

How to Store:

  • Room Temperature:  Store in airtight container up to 5 days.
  • Refrigerator:  Store up to 2 weeks for firmer cookies.
  • Freezer:  Freeze in layers separated with wax paper up to 2 months.

Frequently Asked Questions:

Why didn’t my cookies set?
The mixture likely did not boil long enough.

Why are my cookies dry and crumbly?

The mixture probably boiled too long.

Can I use old-fashioned oats?

Yes. The texture will simply be chewier.

Can I refrigerate them?

Yes. They become firmer when chilled.

Can I add chocolate?

Absolutely. Cocoa powder is a popular addition. 

Can I use the original 3 cups of sugar?
Yes. The original newspaper recipe called for 3 cups, but our family preferred reducing it to 2 cups because we found the original version too sweet. 

Friday, April 24, 2026

Slice and Bake Refrigerator Cookies – Vintage Family Recipe

A simple old-fashioned cookie dough made ahead, chilled, sliced, and baked fresh—just like my mother used to make after supper or for an after school treat. 

Stack of old-fashioned brown sugar refrigerator cookies sliced and baked golden brown on a rustic plate.

My mother made refrigerator cookies often because they were practical, easy, and always ready when company stopped by or when we wanted dessert after supper, or as a midday treat.

She would mix up the dough earlier in the day, shape it into logs, and let it chill in the refrigerator until evening. After supper, she would slice and bake them fresh, so the house filled with that warm cookie smell.

Sometimes she even froze the dough for later, which made homemade cookies feel easy even on busy days. There was nothing quite like cookies served warm from the oven.

Ingredients:

1 c. butter
2 c. brown sugar
3 eggs
1 tsp. vanilla
2 tsp cream of tartar
1 tsp. baking soda
1 tsp. cinnamon
4 to 5 c. flour
1 c. chopped walnuts or pecans (optional)

Directions:

In a large mixing bowl, cream together the butter and brown sugar until light and fluffy.

Beat in the eggs, one at a time, then add the vanilla.

Mix in the cream of tartar, baking soda, cinnamon, and 4 cups of flour.

Add additional flour, a little at a time, until the dough becomes stiff enough to shape.

Stir in chopped walnuts or pecans if using.

Divide dough into 2 equal portions and shape into logs. Wrap tightly in plastic wrap or waxed paper and refrigerate for at least 4 hours.

Preheat oven to 375°F.

Slice dough into 3/8-inch thick rounds. For cleaner slices, use a long piece of thread crossed underneath the dough and pulled upward.

Place cookies on a greased or parchment-lined baking sheet.

Bake for about 7 minutes, or until the edges are lightly golden.

Tips for Best Success:

  • Start with 4 cups flour and add more only if needed
  • Chill dough fully so it slices cleanly
  • Use parchment paper for easier cleanup
  • Don’t overbake—edges should be just lightly golden
  • Thread slicing works beautifully for neat, even cookies

Variations & Substitutions:

  • Use pecans or walnuts—or leave nuts out completely
  • Add a little nutmeg for extra warm spice
  • Roll the logs in cinnamon sugar before chilling
  • Add raisins for an old-fashioned variation
  • Use dark brown sugar for deeper flavor

Serving Suggestions:

  • Serve warm after supper with coffee or tea
  • Great for holiday cookie trays
  • Perfect for after-school snacks
  • Freeze dough logs for quick fresh cookies anytime

How to Store:

  • Refrigerator:  Wrapped dough can be refrigerated up to 5 days
  • Freezer:  Freeze dough logs up to 3 months
  • Baked Cookies:  Store in an airtight container for up to 1 week

Frequently Asked Questions:

Can I freeze the dough?
Yes—this recipe freezes beautifully. Wrap tightly and thaw slightly before slicing.

Why is my dough too soft?

It likely needs more flour or more chilling time.

Can I make smaller cookies?
Yes—just slice thinner and reduce baking time slightly.

Do I have to use nuts?
No, the nuts are completely optional.

Friday, February 20, 2026

Old-Fashioned Oatmeal Raisin Cookies

Perfectly Soft, Perfectly Spiced, and Made from Scratch

Old-Fashioned Oatmeal Raisin Cookies served on a plate, with a glass of milk on the side..

These oatmeal raisin cookies are one of those tried-and-true family recipes that never fail. My mom made them often, and the smell of cinnamon and vanilla drifting through the kitchen meant something sweet was coming out of the oven.

They bake up soft in the center with lightly crisp edges, filled with plump raisins and hearty oats. The secret? Don’t overbake them. They may look slightly underdone when you pull them from the oven, but that’s exactly what keeps them tender and chewy.

This is simple, homemade comfort baking at its best — no mixes, no shortcuts, just real ingredients and love.

Ingredients:

1/2 c. butter
1/2 c. granulated sugar
1/2 c. brown sugar, firmly packed
1 egg
1 tsp. vanilla
1/2 tsp. cinnamon
1/4 tsp. freshly ground nutmeg
Pinch salt
1/2 tsp. baking soda
3/4 c. + 2 Tbsp. flour
1 1/2 c. large rolled oats
2/3 c. raisins 

Directions:

Preheat oven to 375°F. Line a baking sheet with parchment paper if desired.

In a large mixing bowl, cream together the butter, granulated sugar, and brown sugar until light and fluffy.

Add the egg and vanilla. Beat until well combined and airy.

Reduce mixer speed to low. Add cinnamon, nutmeg, salt, and baking soda. Mix until incorporated.

Gradually mix in the flour until almost combined.

Stir in the rolled oats and raisins just until evenly distributed. Do not overmix.

Cover the bowl with plastic wrap and chill the dough for at least 1 hour. The dough should be very cold before baking — this helps create thick, chewy cookies.

Roll dough into 1-inch balls and place on a cookie sheet about 2½ inches apart.

Bake for 9–10 minutes, just until the edges are lightly golden. The centers may look slightly underbaked — that is perfect.

Let cookies cool on the baking sheet for 5 minutes before transferring to a wire rack.

Tips for the Best Soft & Chewy Cookies:

  • Do not overbake — this is the most important tip.
  • Chill the dough well to prevent spreading.
  • Use old-fashioned rolled oats, not instant oats.
  • For extra softness, add 1 tablespoon of molasses to the dough.

Variations & Substitutions:

  • Chocolate Chip Oatmeal Cookies – Replace raisins with chocolate chips.
  • Cranberry Oatmeal Cookies – Substitute dried cranberries for raisins.
  • Nutty Version – Add ½ cup chopped walnuts or pecans.
  • Spiced Oatmeal Cookies – Add a pinch of cloves or allspice.

Serving Suggestions:

These cookies are wonderful served with:

How to Store:

Store cookies in an airtight container at room temperature for up to 5 days.

To keep them extra soft, place a slice of bread in the container — it helps maintain moisture.

To Freeze:

Freeze baked cookies for up to 3 months.

Freeze cookie dough balls on a baking sheet, then transfer to a freezer bag. Bake from frozen, adding 1–2 minutes to the bake time.

Frequently Asked Questions:

Why chill the dough?
Chilling prevents the cookies from spreading too thin and improves texture.

Can I use quick oats?
Yes, but the texture will be softer and less hearty.

Why do my cookies turn hard?
They were likely overbaked. Remove them when the centers still look slightly soft.

Can I double this recipe?
Yes — it doubles beautifully for gatherings or holiday baking.

Friday, January 16, 2026

Snowball Cookies

Buttery, melt-in-your-mouth cookies rolled in powdered sugar—an old-fashioned family favorite.

A plate of powdered sugar-coated snowball cookies stacked high, showing their round shape in a basket sitting on a rustic table..

Snowball Cookies are one of those timeless treats that feel right at home during the winter months, though they’re welcome on the cookie tray any time of year. Buttery, tender, and generously coated in powdered sugar, these little cookies practically melt in your mouth.

This recipe comes from my mother’s recipe box, passed along from my aunt, who was a wonderful baker. Her kitchen was always filled with the comforting aroma of cookies, rolls, breads, and pies, and everything she made was done with care and love. These snowball cookies were always a favorite—simple to make, easy to bake, and always a hit with family and friends. Best of all, you can enjoy these “snowballs” without ever having to step out into the cold.

Ingredients:

1 c. butter, softened
1/2 c. powdered sugar
2 tsp. vanilla
2 c. flour
1/4 tsp. salt
1 c. pecans, chopped
powdered sugar to roll the cookies in

Directions :

Preheat the oven to 350°F. Line a baking sheet with parchment paper or leave it ungreased.

In a large mixing bowl, beat the softened butter, powdered sugar, and vanilla with an electric mixer until smooth and creamy.

Add the flour and salt, mixing on low speed just until combined. Do not overmix. Stir in the chopped pecans until evenly distributed throughout the dough.

Using your hands or a small cookie scoop, shape the dough into walnut-sized balls (about 1 inch). Place them on the prepared baking sheet, spacing them slightly apart.

Bake for 12–15 minutes, or until the bottoms are lightly golden while the tops remain pale. Be careful not to overbake—these cookies should stay light and tender.

Let the cookies rest on the baking sheet for 1–2 minutes. While still warm, gently roll them in powdered sugar to coat.

Transfer to a wire rack to cool completely. Once cooled, roll them a second time in powdered sugar for that classic “snowball” finish.

Serve and enjoy.

Helpful Tip for Coating the Cookies

For an easy and mess-free way to coat the cookies, place powdered sugar in a covered plastic container. Add a few cookies at a time, cover, and gently shake until coated. The first coating will be light, but the second roll in powdered sugar is what gives these cookies their beautiful snowy finish.

Tips for Best Success:

  • Use softened, not melted butter for the right texture.
  • Finely chop the pecans so the cookies hold together well.
  • Don’t overbake—the tops should stay pale.
  • Roll twice in powdered sugar for the best coating.
  • If dough feels too soft, chill it for 20–30 minutes before shaping. 

Variations and Substitutions:

  • Nuts: Swap pecans for walnuts or almonds.
  • Nut-free: Omit nuts and add 2–3 tablespoons cornstarch for a softer texture.
  • Flavor twist: Add 1/2 teaspoon almond extract or a hint of cinnamon.
  • Chocolate version: Mix in mini chocolate chips.
  • Toasted nuts: Lightly toast pecans first for deeper flavor. 

 Serving Suggestions:

  • Add to a holiday cookie tray or gift tin
  • Serve with coffee, tea, or hot cocoa
  • Pair with other vintage cookies for a family dessert spread
  • Perfect for cookie exchanges or gatherings

How To Store:

Room temperature: 
Store in an airtight container for up to 1 week

Refrigerator: 
Not necessary, but will extend freshness slightly

Freezer (baked): 

Freeze up to 3 months; thaw and re-roll in powdered sugar

Freezer (dough): 

Freeze shaped dough balls and bake from frozen, adding 1–2 minutes 

Frequently Asked Questions:

Why are my cookies spreading too much?
The butter may have been too soft. Chill the dough before baking.

Can I make these ahead of time?
Yes, they store and freeze very well, making them great for advance baking.

Why roll twice in powdered sugar?
The first coating melts slightly into the cookie; the second gives that classic snowy look.

Can I use salted butter?
Yes—just reduce or omit the added salt.

Do I have to use nuts?
No, but they are traditional. The texture will be slightly different without them.

Friday, January 31, 2025

Snickerdoodle Cookies

Snickerdoodle Cookies

Snickerdoodle Cookies are soft and chewy with a cinnamon-sugar coating on the outside.  This recipe has been a family favorite for over 60 years.  It is an easy recipe and one of our most requested recipes when we have guests, or give them to family and friends as gifts.

Ingredients

1 c. butter, room temperature
1 1/2 c. sugar
1 tsp. vanilla
2 eggs
2 3/4 c. flour (375g)
1 tsp. baking soda
1/4 tsp. salt
2 tsp. cream of tartar
1 tsp. cinnamon 

Cinnamon Sugar Mixture

1/4 c. sugar
1 1/2 Tbs. cinnamon

Directions 

Preheat oven to 375°. Lightly grease baking sheets or line them with parchment paper.

In a large mixing bowl, combine butter and sugar.  Cream well with an electric mixer. 

Mix in vanilla.  

Add eggs, one at a time, mixing well after each addition.

In a separate bowl, combine flour, baking soda, salt, cream of tartar and cinnamon. Stir with a whisk to make sure the ingredients are evenly distributed. 

With the mixer on low, add the dry ingredients to the butter sugar mixture.  Do this in tow to three increments. 

Place the bowl in the refrigerator for at least 1 hour.  

Scoop out the dough with a tablespoon, then roll the dough between the palms of your hands to make a ball.  

Roll the balls in the sugar cinnamon mixture until coated.  Place the cookie on cookie sheets, spacing them about 2 inches apart.

Bake for 7 to 8 minutes.  Leave the cookies on the baking sheet for 5 minutes before removing them to finish cooling on a wire rack.

Notes

If you don't have cream of tartar, you can substitute it with 1 teaspoon lemon juice or vinegar for each 1/2 teaspoon of cream of tarter.

You can also substitute some of the granulated sugar with brown sugar.

Friday, January 3, 2025

Pfeffernüsse Cookies

Pfeffernüsse Cookies

Free Cardamom Snow Hugs Cookies photo and picture

This is a cookie recipe that my aunt used to make all the time, especially around the Christmas season.   They were soft, chewy and full of flavor.  They are made with molasses, anise, pepper and other spices, these chewy cookies are coated in powdered sugar

Ingredients

4 Tbs. butter
3/4 c. brown sugar
1 egg
1/2 c. molasses
3/4 tsp. baking soda
2 tsp. hot water
3 c. flour
3/4 tsp. salt
2 tsp. anise seeds
1/2 tsp. cloves
1/2 tsp. black pepper
1/2 tsp. cinnamon or cardamom
1/4 tsp. nutmeg
Powdered sugar

Directions 

Preheat oven to 350°. 

In a large mixing bowl, combine butter and brown sugar.  Beat on medium high speed until light and fluffy.

Mix in the egg and the molasses, mixing well until combined.  

In a small bowl, add the baking soda.  Pour in the hot water and stir until the baking soda is dissolved. Mix this into the butter and brown sugar mixture.  

Mix in the salt, anise seeds, cloves, black pepper, cinnamon and nutmeg.

Turn the mixer to low.  Add the flour and mix until combined.  Remember to scrape down the sides and bottom of the bowl to get everything mixed in. The dough will be stiff and thick. 

Place the dough in a plastic bag and refrigerate for at least 6 hours or overnight. 

Scoop out the dough with a tablespoon, then roll the dough between the palms of your hands to make a ball.  Place the balls of dough on a greased cookie sheet, placing them 2 inches apart. 

Add some powdered sugar in a bowl. Set aside.

Bake the cookies for 12 to 14 minutes, or until the tops of the cookies are puffed up and cracked. 

Allow the cookies to cool on the cookie sheet for about 3 minutes.  Remove the cookies from the cookie sheet and drop them into the powdered sugar.  Roll the warm cookies in the powdered sugar, covering all sides.   

Place the cookies on a cooling rack and allow them to cool completely.  Store in an airtight container.

Saturday, April 8, 2023

Easter Sugar Cookies

Easter Sugar Cookies


These sugar cookies are easy to make and they taste so good. They are crisp on the outside, but soft on the inside.  This is a recipe that you and your kids can have so much fun decorating with colorful frostings and sprinkles.

Ingredients

3/4 c. butter
1 c. sugar
2 eggs
1 tsp. vanilla
1/2 c. buttermilk
1 1/2 tsp. baking powder
1/2 tsp. baking soda
 3 c. flour

Icing

4 c. powdered sugar
1 tsp. vanilla
4 to 5 Tbs. milk
assorted food coloring
assorted sprinkles

Directions

Heat oven to 350°. Grease or spray a cookie sheet.

In a mixing bowl, cream the butter, and sugar until light and fluffy.  

Add in the eggs, one at a time, beating well after each addition. 

Pour in the buttermilk and mix in well. 

Stir in the baking powder, baking soda, and flour.  Mix thoroughly until you have a stiff dough.

Cover and refrigerate for 3 hours or until easy to handle.

On a lightly floured surface, roll out dough to 1/8-inch thick. Cut with Easter shaped cookie cutters dipped in flour. Place the cookies 1 inch apart on the prepared baking sheet.  

Bake for 5-10 minutes, or until the sides of the cookies just start to turn brown.

Remove to a cooling rack and allow the cookies to cool completely before frosting them.   

In a small bowl, combine powdered sugar, vanilla and 3 tablespoons milk. Continue to add milk, beating well, until the icing is stiff enough to spread on top of your cookies. Beat until smooth. If the frosting is too thick, add a little more milk. If the frosting is too thin, just add some more powdered sugar.

Divide the icing into as many bowls as you want to make different colors for.  Cover the bowls with a sheet of plastic wrap, so it does not dry out. 

Decorate and frost the cookies as desires.  Let them stand for 30 minutes so the icing sets.  To store the cookies, place them in single layers, with waxed paper between each layer.  Store in a tightly sealed container.

Notes

If you don't want to cut the cookies out in a particular shape, simply roll the dough into walnut sized balls between the palms of your hand. Place on a prepared cookie sheet about 3-inches apart.

Monday, February 27, 2023

No-Bake Healthy Cookies

No-Bake Healthy Cookies


These no-bake cookies are a healthy alternative to the sugary cereals that people like to eat in the morning. Of course, these cookies will also make a healthy snack idea as well. They are so easy to make and the drizzle of chocolate is just perfect to set these apart.

Ingredients

2/3 c. peanut butter
1 1/2 Tbs. honey
1 c. oats
1/4 c. walnuts, chopped
2 Tbs. coconut
1 Tbs. sunflower seeds
2 Tbs. chocolate, chopped
1/2 tsp. coconut oil

Directions

In a bowl, combine peanut butter and honey.  Mix until well blended.

Stir in oats, walnuts, coconut, and sunflower seeds.  Mix until thoroughly combined.

Form cookies from the dough. Take about 1 1/2 tablespoons of the dough and roll it between the palms of your hands.  Place the dough ball on a sheet of parchment or waxed paper.  Flatten the dough out slightly to form a cookie. Continue forming the cookies in this manner until all the dough is used up.

In a microwave bowl, combine chocolate and coconut oil.  Microwave for 15 to 30 seconds, then stir. Repeat the process until the chocolate is melted.

Quickly drizzle the chocolate over the cookies.

When done, place in the refrigerator. Refrigerate for at least 1 hour before eating.  These healthy cookies will last between 4 and 5 days. 

Wednesday, December 14, 2022

Thumbprint Cookies

Thumbprint Cookies

Thumbprint Cookies are buttery, shortbread cookies with jam or jelly in the center. You can use grape, strawberry, apricot or any flavor jam or jelly that you like best. 

The secret to making the best Thumbprint Cookies is not to overbake them. Just bake them until the bottoms are lightly browned, and the tops are set. If you overbake them, they become hard, dry and crunchy, and you'll be disappointed.

Directions

1 c. butter softened
2/3 c. sugar cream together
1 egg
1 tsp. vanilla
1/2 tsp. salt
2 1/3 c. flour
jelly or jam

Directions

Preheat oven to 375°. Lightly spray a cookie sheet or line it with parchment paper. Set aside.

In a mixing bowl, combine the butter and sugar together. Cream the mixture until light and fluffy.

Add in the egg and vanilla.  Beat well until thoroughly combined. 

With your mixer set on low, stir in salt and the flour.

Scoop out a tablespoon of cookie dough using a cookie scoop or a measuring tablespoon.  Roll the dough between the palms of your hand into a ball. Roll the balls in sugar and them on the prepared cookie sheet. 

Using your thumb or a tablespoon, make an indention in the center of each cookie dough ball. So not press so hard that you go all the way through the pan.

Spoon about a 1/2 teaspoonful of jelly or jam in the center of each cookie.

Bake for 8 to 10 minutes, or until the bottoms of the cookies are lightly browned.

Allow the cookies to cool on the baking sheet for about 10 minutes. Transfer the cookies to a cooling rack to finish cooling.  Store the cookies in an airtight container or cookie jar.

Tuesday, December 13, 2022

Chocolate and Vanilla Sugar Cookie Pinwheels

 Chocolate and Vanilla Sugar Cookie Pinwheels


These cookies take just a bit more work, but they will leave your guests and family wondering how you did them.  It is worth the extra step in making these cookies, especially if you love the taste of chocolate and vanilla.

Ingredients

1c. butter
1 c. sugar
2 egg
1 1/2 tsp. vanilla
3/4 tsp. baking powder
1/2 tsp. salt
2  2/3 c. flour
2 Tbs. cocoa powder
1 Tbs. coffee

Directions

In a mixing bowl, cream butter and sugar together until light and fluffy. 

Mix in the egg and vanilla. Beat well until thoroughly combined.

Turn the mixer to a low speed. Mix in the nutmeg and salt. Slowly stir in the flour. The dough should be stiff.

Divide the dough in half. Shape one half of the dough into a flat, thick disc and wrap it in plastic wrap or place it inside a plastic bag and store in the refrigerator. Place the other half of the cookie dough back in the mixing bowl. 

With the mixer set on low, stir in the cocoa powder, and coffee.  Mix until combined. Remove the dough and shape it into a flat, thick disc. Wrap it in a sheet of plastic wrap, or place it in a plastic bag. Place this in the refrigerator and chill both dough balls for about 90 minutes.

Lightly flour a sheet of parchment paper. Remove the plain cookie dough disc from the refrigerator and plastic bag. Flour your rolling pin. Roll the dough out into an 8-inch by 14-inch rectangle. Remember to turn your cookie dough a quarter of a turn and dust the parchment paper with more flour, to keep the dough from sticking. Shape the edges with your hands, so they are straight and even. Set aside somewhere cool while you roll out the chocolate dough.

Get another sheet of parchment paper. Lightly dust the parchment paper and your rolling pin with cocoa powder. Roll the dough out into an 8-inch by 14-inch rectangle. Remember to turn your cookie dough a quarter of a turn and dust the parchment paper with more flour, to keep the dough from sticking. Shape the edges with your hands, so they are straight and even. Set aside somewhere cool while you roll out the chocolate dough.

Bring out the vanilla cookie dough. Carefully remove the chocolate cookie dough from the parchment paper and place on top of the vanilla dough.  Press the chocolate onto the vanilla cookie dough to remove any air pockets. 

Beginning at the long side of the dough, begin rolling the dough up into a log.  Try to roll the dough as tight as you can, using the parchment paper to help.

Cut the log in half, so you have two 7-inch logs. Wrap the dough logs in plastic wrap or in the parchment paper you just used. Bend the edges of the parchment paper or plastic over to seal the dough log inside. 

Chill the dough for at least 2 hours or longer.

When ready to bake, preheat the oven to 350°. Lightly spray or grease a cookie sheet. You can also use parchment paper or silicone baking mats if you have them.

Remove one of the dough logs from the refrigerator. Remove the wrapping. Cut the dough in half-inch slices, so you have 14 cookies. Place the cookies 2-inches apart on the prepared cookie sheet.

Bake for 10 to 15 minutes, or until the outside edges are lightly browned. Remove from the oven and cool on the cookie sheets for 5 minutes. Place the cookies on metal cooling racks to cool completely. Serve and enjoy.

Friday, December 9, 2022

Chocolate Sugar Cookies

Soft Chocolate Sugar Cookies


If you are craving chocolate in a cookie, then this recipe will satisfy you. These are the classic sugar cookies, but they have chocolate in the ingredient list. They stay soft and chewy.

Ingredients

1 c. butter, room temperature
2 c. brown sugar
2 eggs
3 tsp. vanilla
1 2/3 c. flour
1 1/4 c. cocoa powder
1 tsp. baking soda
3/4 tsp. salt
1/2 tsp. baking powder

Directions

Preheat oven to 350°.

In a mixing bowl, beat the butter, and brown sugar together until light and smooth.  

Add the eggs, one at a time, beating well after each addition.

Pour in the vanilla, and mix well.

In another bowl, combine cocoa powder, flour, baking soda, salt and baking powder.  You can sift the ingredients together. If you don't have a sifter, you can use a whisk to mix the dry ingredients together and lighten it up.

Add the flour mixture into the butter, stirring until just combined. Do not over mix. 

In a small bowl, mix 1/2 cup sugar and 2 teaspoon cocoa powder. Set aside.

Scoop some dough up with a regular tablespoon. Roll the dough into balls.

Dip the dough balls in the sugar, cocoa mixture. 

Place the cookie balls on a cookie sheet, leaving about 2 inches of space between each one. Dip the bottom of a glass in the cocoa sugar mixture, then press the cookies down. 

Bake for 8 to 10 (or longer, depending on your oven), until the tops are cracked looking. The cracks will still look wet, but remove them from the oven.  If you bake the cookies until they are dry looking, they will be hard, and not soft and chewy.

Notes

If you like nuts, you can add some chopped walnuts or peanuts to the batter.

You can sprinkle a dusting of powdered sugar over the tops of the warm cookies.

Saturday, May 7, 2022

Applesauce Spice Bars With Spiced Cream Cheese Frosting

Applesauce Spice Bars With Spiced Cream Cheese Frosting

We have a lot of applesauce that we canned ourselves. This is one of our favorite ways to make a delicious dessert and use up some of that applesauce. We hope you enjoy making and eating this cake as much as we do!

Ingredients

1 egg
2/3 c. brown sugar
1/4 c. butter, softened
1 c. applesauce
1 1/2 tsp. cinnamon
1 tsp. nutmeg
1/2 tsp. allspice
1/2 tsp. cloves
1/2 tsp. salt
1 tsp. soda
1 c. flour

Cream Cheese Icing Ingredients

1 (8 oz.) pkg. cream cheese, softened
1/4 c. softened butter
1 tsp. vanilla
1 tsp. pumpkin pie spice
2 c. powdered sugar

Directions

Preheat oven to 350°. Grease an 9 x 13-inch baking pan. Set aside.

In a large bowl, beat egg, brown sugar and butter until smooth. 

Mix in the applesauce.

Stir in the cinnamon, nutmeg, allspice, cloves, salt, and baking soda.  

Add the flour, mixing until well blended.

Spread the batter in the prepared pan. Bake 30 to 40 minutes.

When cool, frost with Cream Cheese Icing

Combine cream cheese, butter, and vanilla in a medium bowl. Mix until creamy. 

Mix in the vanilla, and pumpkin pie spice.  

Gradually add in the powdered sugar, beating until fluffy and fully combined.  

Spread the cream cheese frosting over the cooled cake. Slice and serve.

Notes

If the frosting is too thick to spread on the cake, add a little bit of milk, about a teaspoon at a time, to thin it.  

If the frosting is too thin, then add more powdered sugar. Only add a little bit at a time until you get the right consistency.

Friday, March 11, 2022

Soft Chewy Ginger Molasses Cookies

Soft Chewy Ginger Molasses Cookies

Ginger cookies are our favorite cookies to make and eat. We love the ginger and molasses flavor, and the soft, chewy texture. 

Ingredients

3/4 c. shortening
3/4 c. brown sugar
1 egg
1/2 c. molasses
1 tsp. cinnamon
1 tsp. ginger
1/2 tsp. nutmeg
1/4 tsp. cloves
2 tsp. baking soda
1/4 tsp. salt
2 1/2 c. flour
granulated sugar

Directions

Set oven to 350°. Lightly grease the cookie sheets. Or you can line them with parchment paper.

In a large bowl, combine shortening and brown sugar.  Cream until light and fluffy.

Beat in egg. Mix well. 

Pour in molasses. Beat until thoroughly combined.

Stir in cinnamon, ginger, nutmeg, cloves, baking soda and salt.  Mix thoroughly.

Stir in the flour, mixing until combined.

Cover the dough and place in the refrigerator for about an hour, otherwise the dough will be too sticky to roll into balls. 

Add granulated sugar in a bowl or low sided dish. You need this sugar to roll the dough balls in before baking. 

Remove dough from the refrigerator. Remove about a tablespoon and a half of cookie dough. Roll the dough between the palms of your hands.  

Roll the dough balls in the sugar and place the balls on a cookie sheet.  Put 12 dough balls on the prepared cookie sheet.  Do not flatten the cookies. They spread out as they bake.

 Bake for 8 to 12 minutes, or until done. Allow the cookies to cool on the baking sheet for a couple of minutes before you transfer them to a cooling rack.  Store in an airtight container.

Friday, December 10, 2021

Sugar Cookies

Sugar Cookies

Sugar cookies are one of our favorite cookies.  Especially around Christmas time.

Ingredients

1 1/2 c. butter
2 c. sugar
3 eggs
1 tsp. vanilla
1 c. buttermilk
3 tsp. baking powder
1 tsp. baking soda
6 c. flour

Directions

Heat oven to 350°. Grease a cookie sheet or line the cookie sheet with a silpat.

In a mixing bowl, cream the butter, and sugar until light and fluffy.  

Add in the eggs, one at a time, beating well after each addition. 

Pour in the buttermilk and mix in well. 

Stir in the baking powder, baking soda, and flour.  Mix until smooth.

Roll the dough into balls between the palms of your hand. Place on a prepared cookie sheet about 3-inches apart. Dip the bottom of a glass in sugar.  Press the sugared bottom on the cookie top and press down, so the cookies have a flat top.  Sprinkle with sugar or colored sugar.

Bake for 5-10 minutes, or until the sides just start to turn brown.

Remove to a cooling rack and allow the cookies to cool.   Or at least try to wait that long.

Friday, November 26, 2021

Coconut Raspberry Drops

Coconut Raspberry Drops


 The holiday season is here and it is time to start baking some delicious treats.  These coconut cookies are tender with flavorful raspberry preserves in the center.  They are easy to make and will disappear just as fast.

Ingredients

1/3 c. butter, softened
3 oz. cream cheese
3/4 c. brown sugar
1 egg
2 tsp. orange juice
1 tsp. almond extract
1 tsp. vanilla
1 1/4 c. flour
1 1/2 tsp. baking powder
1/4 tsp. salt
3 3/4 c. sweetened shredded coconut, divided
1 c. raspberry preserves

Directions

Set oven to 350°.  Get 1 or 2 ungreased cookie sheets. 

In a mixing bowl, combine butter, cream cheese, and sugar. Cream until light and fluffy.

Beat in egg, orange juice, almond and vanilla extract. 

Gradually mix in baking powder, salt and flour. 

Stir in 3 cups coconut. Mix well.

Cover the bowl with a sheet of plastic wrap.  Place in the refrigerator until the mixture is easy to handle. This takes about 30 minutes or so. 

Take a tablespoonful of cookie dough and form into a 1-inch ball between the palms of your hands.   Roll the balls in the remaining coconut. 

Place the balls on a cookie sheet. Using your finger, or the handle of a wooden spoon, make a deep indention in the center of each dough ball. 

Bake for 8 to 10 minutes, or until the cookie edges start to turn a light brown color.  Cool 60 seconds. If the indention has closed or become smaller, use the wooden spoon handle to gently make the indention big again. 

Remove cookies to a wire rack.  Fill the indention with raspberry preserves, strawberry jam, or the flavor you like best in preserves or jam.  Cool completely.