Sunday, November 22, 2020

Home-made Stuffing

 Easy Home-made Stuffing


It is easy to make your own stuffing mix, and it is a great way to use up that bread that would otherwise be thrown out.   Just save the ends or the dried out bread slices in a sealable bag and put in the freezer. When you want to make stuffing

Ingredients

12 to 14 c. dried bread, cut into cubes (You can use any bread you like best.)
1 1/2 c. butter
2 large onions, diced
4 to 6 stalks celery, diced small
1 1/2 Tbs.  poultry seasoning
2 tsp. thyme
1 tsp. seasoned salt
1 tsp. black pepper
1 Tbs. parsley
2 c. chicken stock or broth (more or less)
1 tsp. chicken bouillon or 1 bouillon cube (optional)*
cooked giblets (optional)

Directions

To dry the bread, arrange bread cubes on a cookie sheet and allow to air dry. Or you can bake the bread cubes at 250° for 45 to 60 minutes until they are dried out.  Remember to stir them occasionally.  Be sure to watch the bread cubes after 45 minutes to make sure they are not burning. Remove from oven and allow the bread to cool.   

Turn the oven temperature to 350°.

Place the bread cubes in a large bowl. Make sure the bread is very dry, or your stuffing will not be good at all.

In a large skillet over medium heat, melt the butter.  Sauté the celery and onion for about 5 minutes, or until tender.

Add the thyme, poultry seasoning, seasoned salt and pepper.

Pour in the chicken stock or broth. Heat and stir until it comes to a boil. Remove from heat.

Pour the mixture over the bread cubes and toss gently until well mixed.  Place the dressing into a large baking dish and bake 35 minutes or until heated through.  If you are baking a turkey, you can scoop the stuffing to fill the cavity inside the turkey.

* I often use the chicken bouillon to add some extra flavor in the stuffing.  Bouillon is added salt, so you may want to adjust the salt intake. 

**You can buy the broth or make your own.  To make your own, remove the neck and giblets from your turkey and put them in a saucepan.  Add enough water to make the stuffing and have extra to use when you make the gravy for the mashed potatoes.  Simmer them for about an hour or two until they are done. Add more water if needed. Then, what my mother did was cut up the giblets into small pieces and add them to the stuffing as well.


Saturday, November 21, 2020

Make-Ahead Creamy Mashed Potatoes

Make-Ahead Creamy Mashed Potatoes

We make these potatoes for every holiday dinner. They are so good and flavorful! My kids are always volunteering to be the taste testers for this one. I think they could just eat the mashed potatoes and leave the rest of the meal alone.  

Ingredients

5 lbs. potatoes  (I use what ever kind I find on sale.)
3 cloves garlic, peeled and whole
5 Tbs. butter, divided
1 (8oz.) pkg cream cheese, room temperature
1 c. sour cream
1/2 c. milk
1 tsp. garlic powder
2 tsp. onion salt
1/2 tsp. or more pepper

Directions

Wash, peel and quarter the potatoes. Place the potatoes and garlic cloves in a large saucepan and cover with water.  Bring to a boil over high heat.  Turn the heat to low and simmer for 10 to 15 minutes, or until tender. Drain.

With an electric mixer, or by hand, mash the potatoes, garlic cloves and 3 tablespoons butter. 

Add the cream cheese, sour cream, milk, garlic powder, onion salt and pepper. Beat until you have the right consistency that you like for mashed potatoes.  If the potatoes are too dry, add more milk. Taste the potatoes to see if you need more seasoning.

Transfer to a large baking dish. Cut off pieces of the remaining 2 tablespoons butter and place on top of the potatoes. Cover with foil or a lid and refrigerate until you want to serve them. Remove from the refrigerator. Bake at 350° for 30 to 35 minutes, or until heated through.

You can also freeze this dish, and it will keep up to 1 month. Just thaw in the refrigerator before baking.

If you want fluffy mashed potatoes, try this.  Fill a bowl with cold water. After cutting the potatoes, place them in the cold water along with some salt.  Allow the potatoes to sit and soak for about 20 minutes. Drain. Then, fill a saucepan with fresh water. Begin cooking the potatoes as directed above.

You can also make these potatoes just before your dinner.  After they are mashed to the right consistency and tasting as you like, transfer them to a bowl and serve immediately.

Friday, November 20, 2020

Moist Turkey With Bacon in a Paper Bag

Moist Turkey With Bacon in a Paper Bag


Baking a turkey in a paper sack or bag is a recipe that we got from watching the weatherman on our local CBS station, many years ago. It makes the best tasting turkey! The meat stays moist and tender, especially if you put with the bacon over the top.

Ingredients

1 Turkey
Salt and pepper
Garlic powder
Bacon

Directions

Prepare the turkey by removing the giblets and washing the bird. 

Sprinkle the inside cavity and the outside of the turkey with salt, pepper and garlic powder if desired.

Stuff the bird's cavity and neck area with the stuffing you like best. I make the traditional stuffing, but some put in vegetables like celery and onions. Then, after the cavity is full of stuffing, I usually put a slice of bread to cover the cavity and to keep the stuffing from falling out.

Place strips of bacon over the top of the breast, legs and thighs.  See note * below

Carefully place the turkey inside the brown paper bag.  If the bird is bigger than the bag, then you may need to use two bags, fitting the open ends together. I usually place the bag on a rack that fits inside the roaster, so the bag does not sit in the juices.

Staple the opening of the shut and place the bag in a roasting pan. Place the roasting pan in the oven.

Set the oven to 350°, and roast the turkey, allowing about 20 minutes per pound. Cook until the drumstick wiggles freely and juices run clear from the breast.   However, if you want an even better tasting turkey, bake the turkey at 250° for one hour.  Then turn the oven temperature down to 190° to 200° and cook for 8 to 15 hours, depending on the size of your turkey.

If you want crispy bacon, wait until the turkey is almost fully cooked.  Open the paper bag along the top, so the bacon is exposed. Continue baking until the turkey is done, and the bacon is crispy.

Remove from the oven and allow the turkey to rest for 20 minutes before carving.

Notes:

* Some say to roast the turkey with the breast on the top, while others say to have the breast underneath for a juicier bird. I think it is all individual preference. I have done it both ways. The bacon keeps the meat juicy and tender.  

If you can, bake the turkey at the lower temperature.  It takes a lot longer, but in the end, you will have a moist, tender, delicious tasting turkey with a hint of bacon.

Thursday, November 19, 2020

Two Homemade Pumpkin Pies With Crust

 Two Homemade Pumpkin Pies With Crust


Growing up, it was always my job to make the pumpkin pies. I am still the only one who will make a pie at our house with the traditional pastry crust. My son makes the cherry pie with an easy, spicy crust. I will be sharing that crust recipe shortly. Please note that it will also work to make a pumpkin pie as well.

Pie Crust Ingredients Makes 2

3 c. flour
3/4 tsp. salt
2 Tbsp. white sugar
1 c. shortening or lard
3 to 4 Tbsp. cold water

Pumpkin Pie Ingredients

4 eggs
3/4 c. brown sugar
3/4 c. white sugar
1 tsp. salt
2 tsp. cinnamon
1 tsp. ginger
1/4 tsp. nutmeg
1/4 tsp. cloves
1 (29 oz.) can pure pumpkin
2 (12 oz.) cans evaporated milk

Directions

Preheat the oven to 350°. 

Make the pie crust first. 

In a bowl, mix the flour, salt and sugar together.  

Add the shortening. Using a pastry knife or two knives held together, cut the shortening into the flour until it resembles small peas. 

In a small bowl, beat the egg, vinegar and water together. Pour into the flour mixture and mix with a fork until a soft dough forms. If the dough is too wet, add some flour. Try about a teaspoon at a time to get it to the right consistency. If the dough is too dry, pour in a small amount of water. You want to lightly mix until the dough sticks together. It is important not to over mix or the dough will be tough. Wrap in plastic wrap or place in a plastic bag and put the dough in the refrigerator for about an hour for easier rolling.

Divide the dough in half.

On a lightly floured surface, roll out one ball of dough into a 12-inch circle. Fold into quarters. Place dough into a 9-inch pie pan. Carefully unfold dough, so it covers the bottom and sides of the pie pan.  Trim crust to 1/2 inch from the edge of the pan, then crimp or flute the edge. Repeat with the second crust.

Pierce the bottom of the crust with a fork.

Bake pie crusts at 350° for 8-10 minutes. Remove from the oven.  This prevents the crust from being soggy. 

While the crust is baking, it is time to prepare the pumpkin filling.

In a large bowl, beat the eggs until they are lemon colored. Mix in the brown sugar, white sugar, salt, cinnamon, ginger, nutmeg, and cloves. 

Stir in the pumpkin and mix well.

Slowly pour in the evaporated milk, stirring as you pour until thoroughly combined.

Pour evenly into the two slightly prebaked pie shells.  

Sprinkle cinnamon over the top of each pie if desired.

Bake for 40 to 50 minutes, or until a knife inserted in the center comes out clean.

Cool and serve with whipped cream. 

If you want to, you can use all white sugar to make the pie. It turns out just as good.


Wednesday, November 18, 2020

Banana Cream Pie

Banana Cream Pie


Ingredients

3/4  c. sugar
1/4 c.  cornstarch
1/4 tsp.salt
2 1/2 c. milk
3 egg yolks
2 Tbs. butter
1 1/2 tsp. vanilla
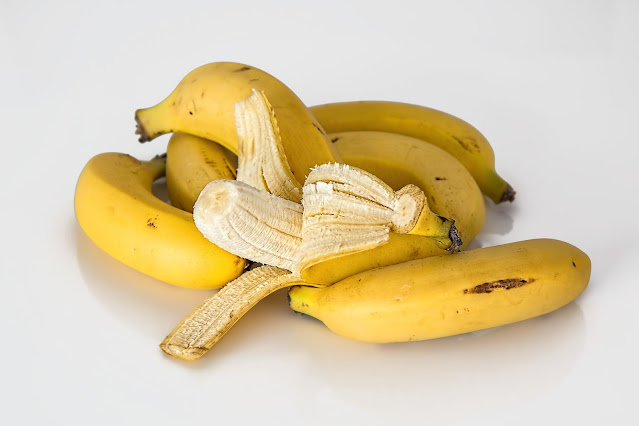
3 bananas
1 (9 inch) pastry shell baked

Meringue

3 egg whites
1/4 tsp. cream of tartar
6 Tbs. sugar

Directions

In a small, heat safe bowl, beat the egg yolks until thick and lemon colored. Set aside.

In a large heavy saucepan, combine the sugar, cornstarch and salt. 

Gradually pour in the milk, whisking constantly to keep the mixture from clumping.  Cook, stirring constantly over medium high heat until thickened and very bubbly. Continue to cook and stir for 2 minutes.  Remove from the heat. 

Whisking constantly, temper the eggs by slowly pouring in some of the hot filling. I usually add about 3 tablespoons of the hot filling into the egg yolks. Place the whisk back into the sauce pan and whisking or stirring constantly, slowly pour in the egg yolk mixture.

Over medium heat, bring the mixture to a boil. Cook and stir for 2 minutes. The mixture should be very thick. Remove from heat.

Add the butter and vanilla, stirring to combine. Set aside to cool as you make the meringue.

 In a large bowl, beat the egg whites and cream of tartar on medium speed until soft peaks form. Gradually beat in sugar, 1 tablespoon at a time, on high until stiff glossy peaks form and sugar is dissolved. Set aside while you finish assembling the banana cream pie.

Slice bananas into the baked pastry shell. Pour the cooled filling over bananas. You can also put some of the filling to cover the bottom of the pie shell and then add the sliced bananas. Pour in the rest of the filling.

Spread the meringue evenly over the top of the still warm filling, sealing the edges to the crus.

Bake at 350° for 15 minutes or until the meringue is golden brown. Cool on a wire rack for 1 hour. Refrigerate for at least 3 hours before serving. Store leftovers in the refrigerator.

Tips:

There are many different schools of thought on making this pie. One thing many cooks agree on is to make sure you cook and stir the pudding filling until it is thick. 

The humidity in the air also determines whether this meringue pie turns out perfect. For best results, make cream pies when the humidity is very low.  

Tuesday, November 17, 2020

No-Knead Cinnamon Sugar Breadsticks

 No-Knead Cinnamon Sugar Breadsticks

Very easy breadsticks to make. These are perfect anytime you are wanting something sweet to eat and they are

Ingredients

2 1/2 to 3 1/2 c. flour
1 c. sugar, divided
1 tsp. salt
1 pkg. active dry yeast or 2 1/4 tsp. of dry yeast
3/4 c. milk
1/2 c. butter
1 tsp. vanilla
2 eggs
1/2 c. chopped nuts
1 tsp. cinnamon

Directions

Grease 2 large baking pans.

In a large bowl, combine 1 cup flour, 1/2 cup sugar, salt and yeast. 

In a small saucepan over medium low heat, warm the milk and butter to a temperature of 120°. Do not bring to a boil, otherwise the milk will curdle. You only want the milk to be lukewarm, like you are going to give it to a baby. If this mixture is too hot, it will kill your yeast and the bread sticks will not rise. 

Pour the milk and butter mixture into the flour.  Mix until combined.  Add the vanilla and eggs, beating well for about 2 minutes. 

Either by hand or with a mixer that has a dough hook, mix in the remaining flour until you have a soft dough.

Place the dough into a lightly greased bowl. (I often use the same bowl that I mixed the dough it. Just grease the sides and bottom of the bowl.  No need to clean it before you do this.)

Cover the bowl with a towel or piece of plastic wrap and place in a warm location. Allow to rise for 30 to 45 minutes, or until doubled in size.  The dough will be sticky, and this is what you want it to be like.

While the dough is raising, combine the nuts, 1/2 c. sugar and cinnamon.  Mix well. 

Pinch off about 1/4 cup dough, approximately the size of a golf ball. Drop this into the nut, sugar and cinnamon mixture, turning to coat all sides.

Stretch the dough into an 8-inch rope. Twist the ends, so the rope looks a corkscrew.  Place on the prepared baking pan.  Or you can dip the breadstick back in the sugar cinnamon mixture again, if desired, and then place on the prepared baking pan. See notes below.

Lightly spray the tops of the bread twists with butter flavored cooking spray to keep them from drying out. Or you can cover them with a towel.  Place in a warm location and allow the dough to rise for 20 or 30 minutes.

Preheat oven to 375°.  Bake for 8 to 10 minutes, or until lightly browned.

Remove from pans and cool slightly before eating. These are best when served warm.

Notes

*You can preheat the oven first, but I usually place them in a cold oven and then turn the oven on. It gives them a little more rising time before they begin to bake.

* You can also mix up extra cinnamon and sugar, so after you get the dough stretched into a log shape, re-coat it in the cinnamon sugar mixture.

Sunday, November 15, 2020

Iced Pumpkin Cookies

Iced Pumpkin Cookies

Ingredients

1/2 c. butter, soft
1 1/2 c. sugar
1 c. canned pumpkin
1 egg
1 tsp. vanilla
2 1/2 c. flour
1 tsp. baking powder
1 tsp. baking soda
2 tsp. cinnamon
1/2 tsp. nutmeg
1/2 tsp. cloves
1/2 tsp. salt

Icing

2 c. powdered sugar
3 Tbs. milk
1 Tbs. melted butter
1 tsp. vanilla

Directions

Preheat oven to 350°. Grease the cookie sheets, or line the pans with parchment paper or a Silicon liner.

Cream butter and sugar until light and fluffy. Stir in the pumpkin.

Add the egg and vanilla. Beat well until creamy.

Mix in the baking powder, baking soda, cinnamon, nutmeg, cloves, and salt. Add the flour, mixing until thoroughly combined.

Drop by spoonfuls onto a cookie sheet. You can also roll the spoonful of dough between the palms of your hands to make them more uniform.

Bake for 9 to 15 minutes, or until edges are firm.  We like a softer cookie, so we bake ours until the tops are no longer shiny or wet looking.

Cool on a wire rack. Frost when the cookies are completely cool. 

** Variations:

You can also add 1 cup white chocolate chips to the mixture and or 1 cup chopped walnuts.

Frosting

In a large bowl, combine the powdered sugar, milk, butter and vanilla. Beat until smooth. If the mixture is too thin, add a little more powdered sugar. Or if the mixture is too thick, add a little more milk.

Drizzle the frosting with a fork over the top of each cookie.