Sunday, April 18, 2021

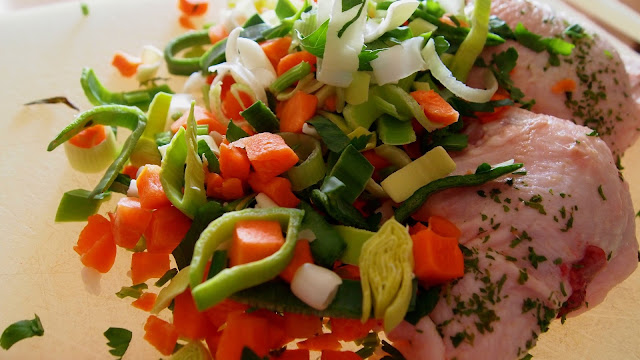
Tender Juicy Pot Roast With Gravy

Tender Juicy Pot Roast With Gravy


You can get a tender, falling apart pot roast by cooking it low and slow.  By baking at a lower temperature, the meat will cook evenly throughout.  

If you bake the roast at 350°, it will get done faster, but the interior is not going to cook at the same temperature as the outside of the pot roast. This results in uneven heating or cooking. The exterior will be well done while the center is still rare.  By cooking at a higher temperature, your results may turn out to be a dried out, tough pot roast that no one will like.

Ingredients

1 3 to 5 lb. beef roast (We use what ever is the cheapest.)
salt, pepper garlic and onion powder
2 Tbs. oil
1 to 2 onions, quartered
15 or more baby carrots or 6 large carrots cut into 2 inch pieces
4 or 6 potatoes, quartered or halved
4 c. beef stock or broth (you can substitute 1 cup  broth for 1 cup red wine)
1 tsp. thyme leaves (optional)
1 tsp. rosemary (optional)

Gravy

2 3/4 c. meat broth
1 Tbs. cornstarch or 2 Tbs. flour
1/4 c. water

Directions

Preheat oven to 200°

Pour the oil into the bottom of a Dutch oven or a roasting pan. 

Season all sides of the beef roast with salt, pepper, garlic powder and onion powder.  I did not give amounts for the seasonings. Everyone has a difference preference of who much they want to use. 

Place the seasoned beef roast, fat side up, into the Dutch oven.

Add the onions, baby carrots, potatoes around the beef roast. 

Pour in the beef stock or broth. Add the thyme leaves and rosemary.

Cover with a tight-fitting lid and place in the oven. 

Bake 8 to 10 hours or until the internal temperature reaches 145°.  If the roast is larger, it may take an up to 15 hours.  

To make gravy

Remove the meat, potatoes, onions and carrots from the Dutch oven or roasting pan. Try to skim off as much of the fat as possible from the liquid.

Use the meat broth left in the Dutch oven or roaster to make gravy.  You  will need at least 2 3/4 cups broth to make the gravy.  If you don't have enough, just add some more broth. 

Put the Dutch oven on the stove top over medium heat and bring it to a simmer.

In a small bowl, mix 2 tablespoons cornstarch or flour in a 1/4 cup of water.  Stirring constantly, slowly pour the cornstarch mixture in bubbling beef stock. Cook and stir until it is thickened to your liking.  If it does not get thick enough for you, mix up some more flour or cornstarch mixture and add that slowly into the bubbling gravy.

You can also use this same recipe in a slow cooker and get the same results.

Saturday, April 17, 2021

Homemade Vanilla Ice Cream

Homemade Vanilla Ice Cream


 Ingredients

2 c. sugar
1/4 c. cornstarch
1/2 tsp. salt
4 c. whole milk
4 eggs, beaten
2 Tbs, vanilla
4 c. chilled heavy whipping cream or table cream will work as well

Directions

In a large heavy saucepan combine sugar, cornstarch and salt.  Gradually blend in the whole milk.  Stirring constantly over medium low heat, cook until the mixture thickens, about 12 to 15 minutes. ** You can also use a double boiler.  Just combine the ingredients and cook over boiling water, stirring occasionally until thickened. 

Gradually pour a small amount of the milk mixture into the beaten eggs whisking constantly as you pour, so your eggs don't cook.  Slowly pour the tempered eggs into the milk mixture, stirring constantly.  Continuing to stir constantly, cook over low heat until mixture reaches 180°.  The mixture should be thick enough coat a metal spoon when you dip it into the mixture. Do not allow to boil.  **If using a double boiler, cook over boiling water for 4 to 5 minutes stirring constantly.

Remove from heat and transfer contents to a heat-safe bowl. Place the bowl in the refrigerator to chill thoroughly.  This step is important because it will give you a smooth ice cream. 

Stir in vanilla and chilled cream. 

Fill your ice cream maker no more than 2/3 full.  Follow the manufacture's directions. For our electric ice cream maker, we use 1 part ice cream salt with 8 parts crushed ice to go between the ice cream container and the outside container.  Refrigerate any remaining mixture until ready to make ice cream again.  

Now most say to remove the ice cream from the ice cream maker and place into a freezer container. Freeze until firm, approximately 2 to 6 hours. However, we could never wait that long.  We always got a dish of ice cream right after it was freshly churned, and it was the best.


Friday, April 16, 2021

Lemon Chicken and Rice Dish

Lemon Chicken and Rice Dish


This lemon chicken with rice is so quick and easy. If you are working and needing to make supper when you come home, this is a great recipe that your family will love. 

Ingredients

2 Tbs. butter
4 chicken breasts, boneless with skins removed
salt and pepper to taste
Tony Chachere's Original Creole Seasoning
1 onion, chopped
1 large carrot, chopped
3 cloves garlic, minced
2 c. chicken broth
1 Tbs. cornstarch
2 Tbs. lemon juice
1/4 tsp. salt.
1 can peas, drained or 1 c. frozen peas
1 1/2 c. instant rice

Directions

Slice the chicken into strips.  You can leave in strips or cut the chicken into bite size pieces. Season the strips or pieces with salt, pepper and Tony Chachere's Original Creole Seasoning.

In a heavy cast iron skillet, melt butter over medium high heat. Add the chicken, onions, carrot, and garlic. Sauté the chicken and vegetables for about 5 to 7 minutes, or until the chicken is no longer pink.

In a medium-sized bowl, combine chicken broth and cornstarch.  Mix until smooth. Stir in the lemon juice and salt. Slowly pour this into the skillet with the chicken and vegetables.  Stirring constantly, bring to a boil and then cook for 1 to 2 minutes.

Add the peas and then bring the mixture to a boil again. 

Stir in the instant rice.  Cover with a lid and turn off the heat. Let stand for 5 minutes, or until water is absorbed.

Thursday, April 15, 2021

Grandma's Chicken and Dumplings

Grandma's Chicken and Dumplings


This is the soup my mother used to fix quite often for our meals. It is comfort food and a very healthy choice to make and eat for supper. Her vegetables all came from her garden, and the chickens came from near-by farms. It was so delicious. This recipe came from her mother, who had a huge family to feed and very little money.

Ingredients

1 chicken whole or cut up (about 3 lbs.) 1 onion, chopped
3 large carrots, chopped
2 celery ribs, chopped
1 or 2 sweet peppers, chopped
3 garlic cloves, minced
8 c. chicken broth
salt and pepper to taste
1 bay leaf

Dumplings

1 3/4 c. flour
1/2 tsp. baking powder
1/2 tsp. salt
1/3 c. shortening or 4 Tbs. butter, melted
3/4 c. milk
1/2 tsp salt

Directions

In a large heavy bottomed pot, combine chicken, onion, carrots, celery, sweet peppers and garlic. 

Pour in the chicken broth. Over medium high heat, bring the mixture to a boil. Reduce heat, cover the pot with a lid and cook 45 to 60 minutes.  Cook until chicken is tender and cooked. This can take about 20 to 25 minutes.

Turn off the heat and allow the soup to cool until the chicken is safe enough to handle, so you don't burn yourself.  Take the chicken out of the broth. Remove the chicken bones and skin. Cut the chicken meat into small pieces. 

Skim the excess grease or fat from the top of the cooled soup broth. Return the chicken to the broth. 

Turn the heat back on under the chicken. As the broth comes to a boil, it is time to make the dumplings. When the soup boils, turn the heat down and let the soup simmer. Taste the soup and add more salt or pepper to taste.

In a bowl, combine the flour, baking powder and salt. Cut in the shortening in the flour mixture if you are using shortening. If you are using the melted butter, make a well in the flour mixture and pour in the milk and butter. Using a wooden spoon, mix the ingredients together to make a dough. If the dough is too dry, add a little more milk. If it is too wet, add a little more flour. 

Drop tablespoonfuls of the dumpling mixture on top of the simmering soup.  Do not pile the dumplings on top of each other.  Just place them all over the top of the soup. 

Place a tight-fitting lid on the pot.  Turn the heat down low to keep the soup at a low simmer. Cook for 15 to 18 minutes, or until dumplings are done.  To test dumplings, stick a toothpick in the center of the dumplings. If it comes out clean, the dumplings are done.

Wednesday, April 14, 2021

Large Brownie Cookies

Large Brownie Cookies


If you love brownies and coffee, then brownie cookies are the next best thing. They are fudgy in the middle, chewy on the edges and very chocolaty with a touch of coffee flavor mixed in.

Ingredients

2 cups or 12 oz bittersweet chocolate chips
1/2 c. butter
3 eggs
1 c. sugar
1/4 c. brown sugar
1 Tbs. vanilla
2 tsp. espresso powder or dry instant coffee
1/2 tsp. baking powder
1/2 tsp salt
3/4 c. flour
1/4 c. unsweetened cocoa powder
1/2 c. mini semi-sweet chocolate chips
1 c. chopped nuts (optional)

Directions

Preheat oven to 350°

In a heavy pot or saucepan, combine bittersweet chocolate chips and butter.  Over very low heat, stir until the chips and butter are melted and the mixture is smooth.  Remove from heat and allow the mixture to cool to lukewarm.

In a mixing bowl, combine eggs, sugar, brown sugar, vanilla and espresso or instant coffee. Beat for about 5 minutes on high speed. The mixture should be thick and creamy.

Reduce the mixer speed to low. Gradually add the cooled melted chocolate chips and butter mixture.  Mix thoroughly.

Stir in the baking powder, salt, flour and cocoa powder, mixing to combine.

Add the mini semi-sweet chocolate chips and nuts if desired.

Cover and chill the cookie dough for about 30 minutes. 

Drop by 1/4 cupfuls onto parchment-lined cookie sheets, placing cookies about 3-inches apart.

Bake 10 to 14 minutes or until the edges are set. The cookies will have the appearance of being slightly wet looking in the center. That is all right and the perfect time to remove them from the oven. It is important to not over bake the cookies, or they will not be fudgy like brownies. Cool the cookies on the cookie sheets for 1 to 2 minutes, then remove to wire racks to finish cooling. The cookie tops will crinkle as they cool.


Tuesday, April 13, 2021

Chicken Fajitas

Chicken Fajitas 

Chicken Fajitas is a super easy meal to put together, and it is very it doesn't have to be made with only chicken. You can use beef, or shrimp. You can season the chicken with the spices, place it in a bowl or bag and pour in lemon juice. Place the mixture in the refrigerator and allow marinating for 1 to 4 hours. Discard the juice in the bag or bowl and then prepare as directed below. Do not add any more lemon juice at the end of the cooking time.

Ingredients

1 1/2 lbs. or 3 boneless, skinless chicken breasts cut into thin strips
1 onion, sliced thin
3 sweet peppers, sliced thin
2 jalapeños, finely chopped (optional)
2 Tbs. oil
1 tsp. garlic powder
1/2 tsp. paprika
1/2 tsp. salt
1/2 tsp. oregano
1/2 tsp. red pepper flakes (optional)
1/4 tsp pepper
1/2 Tbs. chili powder
1/2 Tbs. cumin
2 Tbs. lemon juice
shredded cheese
6 - 8 inch flour tortillas
cheese
sour cream
salsa

Directions

Cut the chicken breast meat into thin strips.

In a bowl, combine garlic powder, paprika, salt, oregano, red pepper flakes, pepper, chili powder, and cumin.

Add the chicken into the bowl of spices. Turn to coat the chicken evenly.

In a heavy cast iron skillet, heat oil over medium heat. Add the onion, sweet peppers and jalapeños.  Cook until they are crisp-tender.  Remove the vegetables, or push them to one side of the skillet. Add half of the chicken to the skillet and cook until done, about 3 to 5 minutes.  Remove from skillet. Fry the remaining chicken until done. 

Return the rest of the chicken, and the vegetables, to the skillet. Stir in the lemon juice and heat through.  

Spoon the chicken and vegetables on to warmed tortillas. You can add some cheese with the chicken if desired. Fold the fajita in half and serve with desired toppings.

Sunday, April 11, 2021

Beef And Cheese Quesadillas

Beef And Cheese Quesadillas

These quesadillas are cheesy, and the ground beef is flavorful. This is one of our go-to meals when we really don't want to cook. They are fast and easy to prepare, and our family loves them.

1/4 c. hot water
1 bouillon cube
1 lb. ground beef
1 onion, chopped
1 to 2 hot peppers, chopped
1 sweet pepper, chopped
2 garlic cloves
1 tsp. chili powder * see below
1 tsp. cumin * see below
1 tsp. paprika
1 tsp. onion powder
1 tsp. garlic powder
1 tsp. oregano
1 tsp. salt
1/4 tsp. black pepper
1/4 tsp. cayenne pepper
1 Tbs. tomato paste
1 can corn, drained (optional)
1 can black beans, drained (optional)
3 c. shredded cheese, divided  (Cheddar cheese, hot pepper Jack cheese or Monterey Jack cheese)
6 to 8 flour tortillas, 8-inch size

Directions

Preheat oven to 200°. This will keep the quesadillas warm as you cook each one, so you can serve all of them at the same time. 

 Dissolve bouillon cube in hot water. Set aside.

In a heavy cast iron skillet, brown the ground beef, onion, hot pepper, sweet pepper and garlic until the beef is no longer pink and the vegetables are tender. Drain off excess grease or fat.

Stir in chili powder, onion powder, oregano, salt, black pepper, cayenne pepper, tomato paste and dissolved bouillon cube with water. 

Lay out the flour tortillas.  Using 2 cups of cheese, place an even amount of cheese on one half side of each of the flour tortillas. 

Place the meat mixture on top of the cheese, dividing equally among the flour tortillas.  

Add some corn over the top of the ground beef.  Add some black beans at this time as well, if you desire.

Sprinkle the remaining 1 cup of cheese over the ground beef and corn. Fold each tortilla shell in half. 

Lightly grease or spray a skillet. Heat the skillet over medium-low heat. Working in batches, cook the quesadillas until the tortilla is golden browned, and the cheese is melted.  This only takes about 2 minutes, so don't leave the quesadillas unattended. When the one side is browned, carefully turn over the tortilla to brown the other side. 

Place on a cookie sheet and keep in a preheated oven to keep warm as you continue cooking the rest of the quesadillas. 

Serve with sour cream, or salsa.  Include some refried beans and Spanish rice, and you will have a complete meal.

 Notes:

We always add about a tablespoon of chili powder and cumin in ours, as we like the taste of these two spices.